Fever Fields: Difference between revisions
Jump to navigation
Jump to search
No edit summary Tag: Reverted |
Tag: Undo |
||
| Line 1: | Line 1: | ||
{DISPLAYTITLE:Fever System}} | {{DISPLAYTITLE:Fever System}} | ||
__TOC__ | __TOC__ | ||
| Line 27: | Line 27: | ||
margin-bottom: 6px; | margin-bottom: 6px; | ||
text-shadow: 0 0 18px rgba(255,80,30,0.45); | text-shadow: 0 0 18px rgba(255,80,30,0.45); | ||
"> | ">⚔ Fever System</div> | ||
<div style="color: #d4b5a8; font-size: 0.98em; line-height: 1.6; max-width: 760px;"> | <div style="color: #d4b5a8; font-size: 0.98em; line-height: 1.6; max-width: 760px;"> | ||
The Fever System transforms selected field and dungeon maps into <strong style="color:#ff9875;">high-stakes hunting zones</strong>. Every Fever map features stronger monster variants, themed equipment sets with <em>random options</em>, Rupes Nigra material drops, special boss encounters, and unique item combo effects. Fever portals are marked by a <strong style="color:#e03a1e;">red portal</strong> at the entrance. | The Fever System transforms selected field and dungeon maps into <strong style="color:#ff9875;">high-stakes hunting zones</strong>. Every Fever map features stronger monster variants, themed equipment sets with <em>random options</em>, Rupes Nigra material drops, special boss encounters, and unique item combo effects. Fever portals are marked by a <strong style="color:#e03a1e;">red portal</strong> at the entrance. | ||
| Line 33: | Line 33: | ||
</div> | </div> | ||
<!-- | <!-- ═══════════════════════════════════════════════════════════ | ||
CORE RULES | CORE RULES | ||
════════════════════════════════════════════════════════════ --> | |||
== Core Fever Rules == | == Core Fever Rules == | ||
| Line 52: | Line 52: | ||
padding: 18px 16px; | padding: 18px 16px; | ||
"> | "> | ||
<div style="font-size:1.3em; margin-bottom:8px;"> | <div style="font-size:1.3em; margin-bottom:8px;">🔥</div> | ||
<div style="font-weight:bold; color:#ff7043; font-size:0.95em; letter-spacing:0.05em; text-transform:uppercase; margin-bottom:8px;">Random Options</div> | <div style="font-weight:bold; color:#ff7043; font-size:0.95em; letter-spacing:0.05em; text-transform:uppercase; margin-bottom:8px;">Random Options</div> | ||
<div style="color:#c8b0a8; font-size:0.88em; line-height:1.65;">Every piece of equipment that drops inside a Fever map | <div style="color:#c8b0a8; font-size:0.88em; line-height:1.65;">Every piece of equipment that drops inside a Fever map — armor, shoes, manteau, and boss drops — always comes with <strong style="color:#ffcc80;">random stat options</strong> themed to that map.</div> | ||
</div> | </div> | ||
| Line 64: | Line 64: | ||
padding: 18px 16px; | padding: 18px 16px; | ||
"> | "> | ||
<div style="font-size:1.3em; margin-bottom:8px;"> | <div style="font-size:1.3em; margin-bottom:8px;">💎</div> | ||
<div style="font-weight:bold; color:#81c784; font-size:0.95em; letter-spacing:0.05em; text-transform:uppercase; margin-bottom:8px;">Rupes Nigra Drops</div> | <div style="font-weight:bold; color:#81c784; font-size:0.95em; letter-spacing:0.05em; text-transform:uppercase; margin-bottom:8px;">Rupes Nigra Drops</div> | ||
<div style="color:#c8b0a8; font-size:0.88em; line-height:1.65;"><strong style="color:#a5d6a7;">All Fever monsters</strong> | <div style="color:#c8b0a8; font-size:0.88em; line-height:1.65;"><strong style="color:#a5d6a7;">All Fever monsters</strong> — normal and elite — have a chance to drop Rupes Nigra crafting materials. Deeper, harder maps have better odds for rarer tiers.</div> | ||
</div> | </div> | ||
| Line 76: | Line 76: | ||
padding: 18px 16px; | padding: 18px 16px; | ||
"> | "> | ||
<div style="font-size:1.3em; margin-bottom:8px;"> | <div style="font-size:1.3em; margin-bottom:8px;">⚠️</div> | ||
<div style="font-weight:bold; color:#90b4e8; font-size:0.95em; letter-spacing:0.05em; text-transform:uppercase; margin-bottom:8px;">GvG / WoE Restriction</div> | <div style="font-weight:bold; color:#90b4e8; font-size:0.95em; letter-spacing:0.05em; text-transform:uppercase; margin-bottom:8px;">GvG / WoE Restriction</div> | ||
<div style="color:#c8b0a8; font-size:0.88em; line-height:1.65;"><strong style="color:#e57373;">Set bonuses and special effects are fully disabled</strong> on any map flagged as GvG, WoE, Castle, or Guild War. Equipment can still be worn, but the bonuses are suppressed.</div> | <div style="color:#c8b0a8; font-size:0.88em; line-height:1.65;"><strong style="color:#e57373;">Set bonuses and special effects are fully disabled</strong> on any map flagged as GvG, WoE, Castle, or Guild War. Equipment can still be worn, but the bonuses are suppressed.</div> | ||
| Line 83: | Line 83: | ||
</div> | </div> | ||
<!-- | <!-- ═══════════════════════════════════════════════════════════ | ||
RUPES NIGRA CHAIN | RUPES NIGRA CHAIN | ||
════════════════════════════════════════════════════════════ --> | |||
== Rupes Nigra Material Chain == | == Rupes Nigra Material Chain == | ||
| Line 107: | Line 107: | ||
font-size:0.88em; | font-size:0.88em; | ||
"> | "> | ||
Progression Crafting Materials | Progression Crafting Materials — Dropped by All Fever Monsters | ||
</div> | </div> | ||
| Line 120: | Line 120: | ||
{{Item List|id=7024|item=Rupes Nigra Fragment|simple=yes}} | {{Item List|id=7024|item=Rupes Nigra Fragment|simple=yes}} | ||
| style="padding:16px; border-bottom:1px solid rgba(255,255,255,0.04); vertical-align:middle;" | | | style="padding:16px; border-bottom:1px solid rgba(255,255,255,0.04); vertical-align:middle;" | | ||
<span style="display:inline-flex;align-items:center;gap:6px;color:#90caf9;font-size:0.90em;font-weight:bold;white-space:nowrap;"> | <span style="display:inline-flex;align-items:center;gap:6px;color:#90caf9;font-size:0.90em;font-weight:bold;white-space:nowrap;">◆ Common</span> | ||
| style="padding:16px; border-bottom:1px solid rgba(255,255,255,0.04); color:#b0a098; font-size:0.92em; line-height:1.6; vertical-align:middle;" | | | style="padding:16px; border-bottom:1px solid rgba(255,255,255,0.04); color:#b0a098; font-size:0.92em; line-height:1.6; vertical-align:middle;" | | ||
Base Fever progression material. Used for entry-level crafting, early Fever set upgrades, and compounding into higher tiers. Drops from all Fever monsters at a moderate rate. | Base Fever progression material. Used for entry-level crafting, early Fever set upgrades, and compounding into higher tiers. Drops from all Fever monsters at a moderate rate. | ||
| Line 128: | Line 128: | ||
{{Item List|id=7025|item=Rupes Nigra Shard|simple=yes}} | {{Item List|id=7025|item=Rupes Nigra Shard|simple=yes}} | ||
| style="padding:16px; border-bottom:1px solid rgba(255,255,255,0.04); vertical-align:middle;" | | | style="padding:16px; border-bottom:1px solid rgba(255,255,255,0.04); vertical-align:middle;" | | ||
<span style="display:inline-flex;align-items:center;gap:6px;color:#ce93d8;font-size:0.90em;font-weight:bold;white-space:nowrap;"> | <span style="display:inline-flex;align-items:center;gap:6px;color:#ce93d8;font-size:0.90em;font-weight:bold;white-space:nowrap;">◆◆ Uncommon</span> | ||
| style="padding:16px; border-bottom:1px solid rgba(255,255,255,0.04); color:#b0a098; font-size:0.92em; line-height:1.6; vertical-align:middle;" | | | style="padding:16px; border-bottom:1px solid rgba(255,255,255,0.04); color:#b0a098; font-size:0.92em; line-height:1.6; vertical-align:middle;" | | ||
Mid-tier crafting material. Used for enhanced Fever equipment upgrades, item-combo prerequisites, and infusing stronger set bonuses. More frequent in deeper Fever maps. | Mid-tier crafting material. Used for enhanced Fever equipment upgrades, item-combo prerequisites, and infusing stronger set bonuses. More frequent in deeper Fever maps. | ||
| Line 136: | Line 136: | ||
{{Item List|id=7026|item=Rupes Nigra Stone|simple=yes}} | {{Item List|id=7026|item=Rupes Nigra Stone|simple=yes}} | ||
| style="padding:16px; vertical-align:middle;" | | | style="padding:16px; vertical-align:middle;" | | ||
<span style="display:inline-flex;align-items:center;gap:6px;color:#ffcc80;font-size:0.90em;font-weight:bold;white-space:nowrap;"> | <span style="display:inline-flex;align-items:center;gap:6px;color:#ffcc80;font-size:0.90em;font-weight:bold;white-space:nowrap;">◆◆◆ Rare</span> | ||
| style="padding:16px; color:#b0a098; font-size:0.92em; line-height:1.6; vertical-align:middle;" | | | style="padding:16px; color:#b0a098; font-size:0.92em; line-height:1.6; vertical-align:middle;" | | ||
High-value capstone material. Required for top-tier Fever set refinement, special equipment fusion, and late-game crafting chains. Best obtained from Fever MVP kills and elite monsters. | High-value capstone material. Required for top-tier Fever set refinement, special equipment fusion, and late-game crafting chains. Best obtained from Fever MVP kills and elite monsters. | ||
| Line 142: | Line 142: | ||
</div> | </div> | ||
<!-- | <!-- ═══════════════════════════════════════════════════════════ | ||
MAP NAVIGATOR | MAP NAVIGATOR | ||
════════════════════════════════════════════════════════════ --> | |||
== Fever Map Navigator == | == Fever Map Navigator == | ||
| Line 156: | Line 156: | ||
<div style="background:linear-gradient(160deg,rgba(20,40,10,0.90),rgba(10,24,6,0.98));border:1px solid rgba(80,160,40,0.35);border-radius:8px;padding:14px 12px;text-align:center;"> | <div style="background:linear-gradient(160deg,rgba(20,40,10,0.90),rgba(10,24,6,0.98));border:1px solid rgba(80,160,40,0.35);border-radius:8px;padding:14px 12px;text-align:center;"> | ||
<div style="font-size:1.4em;margin-bottom:6px;"> | <div style="font-size:1.4em;margin-bottom:6px;">🌿</div> | ||
<div style="color:#81c784;font-weight:bold;font-size:0.88em;margin-bottom:4px;">Payon Forest</div> | <div style="color:#81c784;font-weight:bold;font-size:0.88em;margin-bottom:4px;">Payon Forest</div> | ||
<div style="color:#78909c;font-size:0.78em;">Forest Set</div> | <div style="color:#78909c;font-size:0.78em;">Forest Set</div> | ||
| Line 162: | Line 162: | ||
<div style="background:linear-gradient(160deg,rgba(40,30,8,0.90),rgba(24,18,4,0.98));border:1px solid rgba(200,160,30,0.35);border-radius:8px;padding:14px 12px;text-align:center;"> | <div style="background:linear-gradient(160deg,rgba(40,30,8,0.90),rgba(24,18,4,0.98));border:1px solid rgba(200,160,30,0.35);border-radius:8px;padding:14px 12px;text-align:center;"> | ||
<div style="font-size:1.4em;margin-bottom:6px;"> | <div style="font-size:1.4em;margin-bottom:6px;">🏜️</div> | ||
<div style="color:#ffd54f;font-weight:bold;font-size:0.88em;margin-bottom:4px;">Sograt Desert</div> | <div style="color:#ffd54f;font-weight:bold;font-size:0.88em;margin-bottom:4px;">Sograt Desert</div> | ||
<div style="color:#78909c;font-size:0.78em;">Sand Set</div> | <div style="color:#78909c;font-size:0.78em;">Sand Set</div> | ||
| Line 168: | Line 168: | ||
<div style="background:linear-gradient(160deg,rgba(20,10,30,0.90),rgba(10,4,20,0.98));border:1px solid rgba(130,60,200,0.35);border-radius:8px;padding:14px 12px;text-align:center;"> | <div style="background:linear-gradient(160deg,rgba(20,10,30,0.90),rgba(10,4,20,0.98));border:1px solid rgba(130,60,200,0.35);border-radius:8px;padding:14px 12px;text-align:center;"> | ||
<div style="font-size:1.4em;margin-bottom:6px;"> | <div style="font-size:1.4em;margin-bottom:6px;">🏚️</div> | ||
<div style="color:#ce93d8;font-weight:bold;font-size:0.88em;margin-bottom:4px;">Glast Heim</div> | <div style="color:#ce93d8;font-weight:bold;font-size:0.88em;margin-bottom:4px;">Glast Heim</div> | ||
<div style="color:#78909c;font-size:0.78em;">Shadow Set</div> | <div style="color:#78909c;font-size:0.78em;">Shadow Set</div> | ||
| Line 174: | Line 174: | ||
<div style="background:linear-gradient(160deg,rgba(40,10,4,0.90),rgba(24,4,2,0.98));border:1px solid rgba(220,80,30,0.40);border-radius:8px;padding:14px 12px;text-align:center;"> | <div style="background:linear-gradient(160deg,rgba(40,10,4,0.90),rgba(24,4,2,0.98));border:1px solid rgba(220,80,30,0.40);border-radius:8px;padding:14px 12px;text-align:center;"> | ||
<div style="font-size:1.4em;margin-bottom:6px;"> | <div style="font-size:1.4em;margin-bottom:6px;">🌋</div> | ||
<div style="color:#ff7043;font-weight:bold;font-size:0.88em;margin-bottom:4px;">Magma Dungeon</div> | <div style="color:#ff7043;font-weight:bold;font-size:0.88em;margin-bottom:4px;">Magma Dungeon</div> | ||
<div style="color:#78909c;font-size:0.78em;">Magma Set</div> | <div style="color:#78909c;font-size:0.78em;">Magma Set</div> | ||
| Line 180: | Line 180: | ||
<div style="background:linear-gradient(160deg,rgba(10,20,40,0.90),rgba(4,10,24,0.98));border:1px solid rgba(40,140,220,0.35);border-radius:8px;padding:14px 12px;text-align:center;"> | <div style="background:linear-gradient(160deg,rgba(10,20,40,0.90),rgba(4,10,24,0.98));border:1px solid rgba(40,140,220,0.35);border-radius:8px;padding:14px 12px;text-align:center;"> | ||
<div style="font-size:1.4em;margin-bottom:6px;"> | <div style="font-size:1.4em;margin-bottom:6px;">🐉</div> | ||
<div style="color:#64b5f6;font-weight:bold;font-size:0.88em;margin-bottom:4px;">Abyss Lake</div> | <div style="color:#64b5f6;font-weight:bold;font-size:0.88em;margin-bottom:4px;">Abyss Lake</div> | ||
<div style="color:#78909c;font-size:0.78em;">Dragon & Bone Set</div> | <div style="color:#78909c;font-size:0.78em;">Dragon & Bone Set</div> | ||
| Line 187: | Line 187: | ||
</div> | </div> | ||
<!-- | <!-- ═══════════════════════════════════════════════════════════ | ||
MAP 1 | MAP 1 — PAYON FOREST | ||
════════════════════════════════════════════════════════════ --> | |||
== Payon Forest Fever Field == | == Payon Forest Fever Field == | ||
<div style="background:linear-gradient(135deg,rgba(12,28,8,0.94),rgba(6,16,4,0.99));border:2px solid rgba(80,160,40,0.36);border-left:5px solid #66bb6a;border-radius:10px;padding:18px 22px 16px;margin:0 0 22px 0;position:relative;overflow:hidden;"> | <div style="background:linear-gradient(135deg,rgba(12,28,8,0.94),rgba(6,16,4,0.99));border:2px solid rgba(80,160,40,0.36);border-left:5px solid #66bb6a;border-radius:10px;padding:18px 22px 16px;margin:0 0 22px 0;position:relative;overflow:hidden;"> | ||
<div style="position:absolute;top:0;right:0;width:240px;height:100%;background:linear-gradient(270deg,rgba(102,187,106,0.10),transparent);pointer-events:none;"></div> | <div style="position:absolute;top:0;right:0;width:240px;height:100%;background:linear-gradient(270deg,rgba(102,187,106,0.10),transparent);pointer-events:none;"></div> | ||
<div style="position:absolute;bottom:-18px;right:24px;font-size:5em;opacity:0.045;pointer-events:none;line-height:1;"> | <div style="position:absolute;bottom:-18px;right:24px;font-size:5em;opacity:0.045;pointer-events:none;line-height:1;">🌲</div> | ||
<div style="position:relative;z-index:1;color:#a5d6a7;font-size:0.90em;line-height:1.65;"> | <div style="position:relative;z-index:1;color:#a5d6a7;font-size:0.90em;line-height:1.65;"> | ||
Payon Forest has been corrupted by an ancient blight | Payon Forest has been corrupted by an ancient blight — Brute and Plant monsters have grown far stronger and more aggressive. The Forest Set focuses on <strong style="color:#c8e6c9;">natural vitality, high HP recovery, and elemental resistance</strong> against Poison and Earth damage. Hunters who master this field gain regenerative power unmatched in clean hunting grounds. | ||
[[File:Pay_fild07_fever.png|250px]] | [[File:Pay_fild07_fever.png|250px]] | ||
| Line 202: | Line 202: | ||
<div style="position:relative;z-index:1;margin-top:14px;background:rgba(6,20,4,0.64);border:1px solid rgba(100,180,80,0.18);border-radius:9px;padding:13px 15px;"> | <div style="position:relative;z-index:1;margin-top:14px;background:rgba(6,20,4,0.64);border:1px solid rgba(100,180,80,0.18);border-radius:9px;padding:13px 15px;"> | ||
<div style="font-weight:bold;color:#a5d6a7;font-size:0.88em;letter-spacing:0.09em;text-transform:uppercase;margin-bottom:10px;"> | <div style="font-weight:bold;color:#a5d6a7;font-size:0.88em;letter-spacing:0.09em;text-transform:uppercase;margin-bottom:10px;">🌿 Monster Population — pay_fild07</div> | ||
<div style="display:grid;grid-template-columns:1fr 1fr;gap:10px;"> | <div style="display:grid;grid-template-columns:1fr 1fr;gap:10px;"> | ||
<div style="background:rgba(6,20,4,0.84);border:1px solid rgba(100,180,80,0.22);border-radius:9px;padding:11px 13px;position:relative;overflow:hidden;"> | <div style="background:rgba(6,20,4,0.84);border:1px solid rgba(100,180,80,0.22);border-radius:9px;padding:11px 13px;position:relative;overflow:hidden;"> | ||
| Line 233: | Line 233: | ||
<div style="position:relative;z-index:1;display:grid;grid-template-columns:1fr auto;gap:12px;align-items:center;"> | <div style="position:relative;z-index:1;display:grid;grid-template-columns:1fr auto;gap:12px;align-items:center;"> | ||
<div> | <div> | ||
<div style="font-weight:bold;color:#ffc107;font-size:0.82em;letter-spacing:0.10em;text-transform:uppercase;margin-bottom:6px;"> | <div style="font-weight:bold;color:#ffc107;font-size:0.82em;letter-spacing:0.10em;text-transform:uppercase;margin-bottom:6px;">👑 Fever MVP</div> | ||
<div>{{Monster|id=3059|name=Senshu World Sage}}</div> | <div>{{Monster|id=3059|name=Senshu World Sage}}</div> | ||
</div> | </div> | ||
| Line 254: | Line 254: | ||
<div style="background:rgba(6,20,4,0.85);border:1px solid rgba(80,160,40,0.28);border-radius:8px;overflow:hidden;"> | <div style="background:rgba(6,20,4,0.85);border:1px solid rgba(80,160,40,0.28);border-radius:8px;overflow:hidden;"> | ||
<div style="background:linear-gradient(90deg,rgba(80,160,40,0.22),transparent);padding:10px 14px;border-bottom:1px solid rgba(80,160,40,0.18);font-weight:bold;color:#81c784;font-size:0.88em;letter-spacing:0.06em;text-transform:uppercase;"> | <div style="background:linear-gradient(90deg,rgba(80,160,40,0.22),transparent);padding:10px 14px;border-bottom:1px solid rgba(80,160,40,0.18);font-weight:bold;color:#81c784;font-size:0.88em;letter-spacing:0.06em;text-transform:uppercase;">🛡 Forest Armor</div> | ||
<div style="padding:12px 14px;"> | <div style="padding:12px 14px;"> | ||
{{Item List|id=15000|item=Forest Armor|simple=yes}} | {{Item List|id=15000|item=Forest Armor|simple=yes}} | ||
| Line 265: | Line 265: | ||
<li>Neutral element resistance <span style="color:#546e7a;">+2% ~ +5%</span></li> | <li>Neutral element resistance <span style="color:#546e7a;">+2% ~ +5%</span></li> | ||
<li>Poison element resistance <span style="color:#546e7a;">+4% ~ +8%</span></li> | <li>Poison element resistance <span style="color:#546e7a;">+4% ~ +8%</span></li> | ||
<li>Damage from Plant race <span style="color:#546e7a;"> | <li>Damage from Plant race <span style="color:#546e7a;">−3% ~ −6%</span></li> | ||
</ul> | </ul> | ||
</div> | </div> | ||
| Line 271: | Line 271: | ||
<div style="background:rgba(6,20,4,0.85);border:1px solid rgba(80,160,40,0.28);border-radius:8px;overflow:hidden;"> | <div style="background:rgba(6,20,4,0.85);border:1px solid rgba(80,160,40,0.28);border-radius:8px;overflow:hidden;"> | ||
<div style="background:linear-gradient(90deg,rgba(80,160,40,0.22),transparent);padding:10px 14px;border-bottom:1px solid rgba(80,160,40,0.18);font-weight:bold;color:#81c784;font-size:0.88em;letter-spacing:0.06em;text-transform:uppercase;"> | <div style="background:linear-gradient(90deg,rgba(80,160,40,0.22),transparent);padding:10px 14px;border-bottom:1px solid rgba(80,160,40,0.18);font-weight:bold;color:#81c784;font-size:0.88em;letter-spacing:0.06em;text-transform:uppercase;">👟 Forest Shoes</div> | ||
<div style="padding:12px 14px;"> | <div style="padding:12px 14px;"> | ||
{{Item List|id=22000|item=Forest Shoes|simple=yes}} | {{Item List|id=22000|item=Forest Shoes|simple=yes}} | ||
| Line 288: | Line 288: | ||
<div style="background:rgba(6,20,4,0.85);border:1px solid rgba(80,160,40,0.28);border-radius:8px;overflow:hidden;"> | <div style="background:rgba(6,20,4,0.85);border:1px solid rgba(80,160,40,0.28);border-radius:8px;overflow:hidden;"> | ||
<div style="background:linear-gradient(90deg,rgba(80,160,40,0.22),transparent);padding:10px 14px;border-bottom:1px solid rgba(80,160,40,0.18);font-weight:bold;color:#81c784;font-size:0.88em;letter-spacing:0.06em;text-transform:uppercase;"> | <div style="background:linear-gradient(90deg,rgba(80,160,40,0.22),transparent);padding:10px 14px;border-bottom:1px solid rgba(80,160,40,0.18);font-weight:bold;color:#81c784;font-size:0.88em;letter-spacing:0.06em;text-transform:uppercase;">🧥 Forest Manteau</div> | ||
<div style="padding:12px 14px;"> | <div style="padding:12px 14px;"> | ||
{{Item List|id=20000|item=Forest Manteau|simple=yes}} | {{Item List|id=20000|item=Forest Manteau|simple=yes}} | ||
| Line 294: | Line 294: | ||
<div style="color:#78909c;font-size:0.78em;font-weight:bold;letter-spacing:0.08em;text-transform:uppercase;margin-bottom:8px;">Possible Random Options</div> | <div style="color:#78909c;font-size:0.78em;font-weight:bold;letter-spacing:0.08em;text-transform:uppercase;margin-bottom:8px;">Possible Random Options</div> | ||
<ul style="margin:0;padding:0 0 0 16px;color:#b0c8a0;font-size:0.87em;line-height:1.80;"> | <ul style="margin:0;padding:0 0 0 16px;color:#b0c8a0;font-size:0.87em;line-height:1.80;"> | ||
<li>Ranged damage received <span style="color:#546e7a;"> | <li>Ranged damage received <span style="color:#546e7a;">−3% ~ −7%</span></li> | ||
<li>Flee <span style="color:#546e7a;">+4 ~ +10</span></li> | <li>Flee <span style="color:#546e7a;">+4 ~ +10</span></li> | ||
<li>Perfect Dodge <span style="color:#546e7a;">+2 ~ +5</span></li> | <li>Perfect Dodge <span style="color:#546e7a;">+2 ~ +5</span></li> | ||
<li>Earth element resistance <span style="color:#546e7a;">+4% ~ +8%</span></li> | <li>Earth element resistance <span style="color:#546e7a;">+4% ~ +8%</span></li> | ||
<li>Wind element resistance <span style="color:#546e7a;">+3% ~ +6%</span></li> | <li>Wind element resistance <span style="color:#546e7a;">+3% ~ +6%</span></li> | ||
<li>Damage from Brute race <span style="color:#546e7a;"> | <li>Damage from Brute race <span style="color:#546e7a;">−3% ~ −6%</span></li> | ||
</ul> | </ul> | ||
</div> | </div> | ||
| Line 315: | Line 315: | ||
margin: 0 0 20px 0; | margin: 0 0 20px 0; | ||
"> | "> | ||
<div style="font-weight:bold;color:#81c784;font-size:0.92em;letter-spacing:0.06em;text-transform:uppercase;margin-bottom:12px;"> | <div style="font-weight:bold;color:#81c784;font-size:0.92em;letter-spacing:0.06em;text-transform:uppercase;margin-bottom:12px;">⬡ Full Set Effect (Armor + Shoes + Manteau)</div> | ||
<ul style="margin:0;padding:0 0 0 18px;color:#a8c8a0;font-size:0.92em;line-height:1.80;"> | <ul style="margin:0;padding:0 0 0 18px;color:#a8c8a0;font-size:0.92em;line-height:1.80;"> | ||
<li>Max HP +<strong style="color:#c8e6c9;">10%</strong></li> | <li>Max HP +<strong style="color:#c8e6c9;">10%</strong></li> | ||
<li>Natural HP recovery +<strong style="color:#c8e6c9;">15%</strong></li> | <li>Natural HP recovery +<strong style="color:#c8e6c9;">15%</strong> </li> | ||
<li>Damage dealt to Plant and Brute monsters +<strong style="color:#c8e6c9;">8%</strong></li> | <li>Damage dealt to Plant and Brute monsters +<strong style="color:#c8e6c9;">8%</strong></li> | ||
<li>HP healing received | <li>HP healing received <strong style="color:#c8e6c9;">+20%</strong> </li> | ||
</ul> | </ul> | ||
<div style="margin-top:10px;padding-top:10px;border-top:1px solid rgba(80,160,40,0.20);color:#546e7a;font-size:0.82em;"> | <div style="margin-top:10px;padding-top:10px;border-top:1px solid rgba(80,160,40,0.20);color:#546e7a;font-size:0.82em;">⚠ Set bonuses are disabled on GvG / WoE flagged maps.</div> | ||
</div> | </div> | ||
=== Forest Item | === Forest Item Combo === | ||
<div style=" | <div style=" | ||
background: linear-gradient(135deg, rgba( | background: linear-gradient(135deg, rgba(14,36,10,0.95), rgba(6,20,4,0.98)); | ||
border: 2px solid rgba(100,200,60,0.40); | |||
border-left: 5px solid #8bc34a; | |||
border: 2px solid rgba(100,200,60,0. | |||
border-left: 5px solid # | |||
border-radius: 8px; | border-radius: 8px; | ||
padding: 16px 20px; | padding: 16px 20px; | ||
| Line 372: | Line 336: | ||
position: relative; overflow: hidden; | position: relative; overflow: hidden; | ||
"> | "> | ||
<div style="position:absolute;top:0;right:0;width: | <div style="position:absolute;top:0;right:0;width:180px;height:100%;background:linear-gradient(270deg,rgba(100,200,60,0.07),transparent);pointer-events:none;"></div> | ||
<div style="font-weight:bold;color:#aed581;font-size:0.95em;letter-spacing:0.06em;text-transform:uppercase;margin-bottom:12px;">🔗 Blight Warden Combo</div> | |||
<div style="font-weight:bold;color:# | |||
<div style="display:grid;grid-template-columns:auto 1fr;gap:12px;align-items:start;margin-bottom:14px;"> | <div style="display:grid;grid-template-columns:auto 1fr;gap:12px;align-items:start;margin-bottom:14px;"> | ||
<div style="color:#78909c;font-size:0.82em;font-weight:bold;text-transform:uppercase;padding-top:2px;">Items</div> | <div style="color:#78909c;font-size:0.82em;font-weight:bold;text-transform:uppercase;padding-top:2px;">Items</div> | ||
<div> | <div> | ||
{{Item List|id= | {{Item List|id=15000|item=Forest Armor|simple=yes}} {{Item List|id=4059|item=Evil Druid Card|simple=yes}} | ||
<div style="margin-top: | <div style="margin-top:6px;">{{Item List|id=2258|item=Spiky Band|simple=yes}} <span style="color:#90a4ae;font-size:0.88em;">(slotted into any armor, shoes, or manteau)</span></div> | ||
</div> | </div> | ||
</div> | </div> | ||
<div style="color:#78909c;font-size:0.82em;font-weight:bold;text-transform:uppercase;margin-bottom:8px;">Combo Effect</div> | <div style="color:#78909c;font-size:0.82em;font-weight:bold;text-transform:uppercase;margin-bottom:8px;">Combo Effect</div> | ||
<ul style="margin:0;padding:0 0 0 18px;color:#c5e1a5;font-size:0.91em;line-height:1.80;"> | <ul style="margin:0;padding:0 0 0 18px;color:#c5e1a5;font-size:0.91em;line-height:1.80;"> | ||
<li> | <li>Poison element resistance +<strong style="color:#dcedc8;">12%</strong> additional</li> | ||
<li> | <li>VIT +<strong style="color:#dcedc8;">3</strong></li> | ||
<li> | <li>HP healing received <strong style="color:#dcedc8;">+30%</strong> </li> | ||
</ul> | </ul> | ||
</div> | </div> | ||
| Line 399: | Line 356: | ||
<div style="background:rgba(6,18,4,0.88);border:1px solid rgba(80,160,40,0.25);border-radius:8px;padding:14px 18px;margin:0 0 8px 0;"> | <div style="background:rgba(6,18,4,0.88);border:1px solid rgba(80,160,40,0.25);border-radius:8px;padding:14px 18px;margin:0 0 8px 0;"> | ||
<div style="color:#78909c;font-size:0.80em;font-weight:bold;letter-spacing:0.08em;text-transform:uppercase;margin-bottom:8px;">Fever MVP Drop | <div style="color:#78909c;font-size:0.80em;font-weight:bold;letter-spacing:0.08em;text-transform:uppercase;margin-bottom:8px;">Fever MVP Drop — Forest Armor / Shoes / Manteau with Special Options</div> | ||
<ul style="margin:0;padding:0 0 0 18px;color:#b0c8a0;font-size:0.89em;line-height:1.75;"> | <ul style="margin:0;padding:0 0 0 18px;color:#b0c8a0;font-size:0.89em;line-height:1.75;"> | ||
<li>Damage against Plant race <span style="color:#546e7a;">+8% ~ +14%</span></li> | <li>Damage against Plant race <span style="color:#546e7a;">+8% ~ +14%</span></li> | ||
| Line 409: | Line 366: | ||
</div> | </div> | ||
<!-- | <!-- ═══════════════════════════════════════════════════════════ | ||
MAP 2 | MAP 2 — SOGRAT DESERT | ||
════════════════════════════════════════════════════════════ --> | |||
== Sograt Desert Fever Field == | == Sograt Desert Fever Field == | ||
<div style="background:linear-gradient(135deg,rgba(36,28,6,0.94),rgba(18,12,2,0.99));border:2px solid rgba(220,180,40,0.34);border-left:5px solid #ffd54f;border-radius:10px;padding:18px 22px 16px;margin:0 0 22px 0;position:relative;overflow:hidden;"> | <div style="background:linear-gradient(135deg,rgba(36,28,6,0.94),rgba(18,12,2,0.99));border:2px solid rgba(220,180,40,0.34);border-left:5px solid #ffd54f;border-radius:10px;padding:18px 22px 16px;margin:0 0 22px 0;position:relative;overflow:hidden;"> | ||
<div style="position:absolute;top:0;right:0;width:240px;height:100%;background:linear-gradient(270deg,rgba(255,213,79,0.10),transparent);pointer-events:none;"></div> | <div style="position:absolute;top:0;right:0;width:240px;height:100%;background:linear-gradient(270deg,rgba(255,213,79,0.10),transparent);pointer-events:none;"></div> | ||
<div style="position:absolute;bottom:-18px;right:24px;font-size:5em;opacity:0.045;pointer-events:none;line-height:1;"> | <div style="position:absolute;bottom:-18px;right:24px;font-size:5em;opacity:0.045;pointer-events:none;line-height:1;">🏜️</div> | ||
<div style="position:relative;z-index:1;color:#fff9c4;font-size:0.90em;line-height:1.65;"> | <div style="position:relative;z-index:1;color:#fff9c4;font-size:0.90em;line-height:1.65;"> | ||
The Sograt Desert Fever Field is a merciless expanse of scorched dunes. Demon and Brute-type monsters have been mutated by the desert heat and roam in ferocious packs. The Sand Set is built around <strong style="color:#fff59d;">endurance, defensive layers, and resistance to Fire and ranged attacks</strong>, rewarding players who can outlast and outlevel the desert's punishment. | The Sograt Desert Fever Field is a merciless expanse of scorched dunes. Demon and Brute-type monsters have been mutated by the desert heat and roam in ferocious packs. The Sand Set is built around <strong style="color:#fff59d;">endurance, defensive layers, and resistance to Fire and ranged attacks</strong>, rewarding players who can outlast and outlevel the desert's punishment. | ||
| Line 425: | Line 384: | ||
<div style="position:relative;z-index:1;margin-top:14px;background:rgba(24,18,4,0.64);border:1px solid rgba(220,180,40,0.18);border-radius:9px;padding:13px 15px;"> | <div style="position:relative;z-index:1;margin-top:14px;background:rgba(24,18,4,0.64);border:1px solid rgba(220,180,40,0.18);border-radius:9px;padding:13px 15px;"> | ||
<div style="font-weight:bold;color:#fff176;font-size:0.88em;letter-spacing:0.09em;text-transform:uppercase;margin-bottom:10px;"> | <div style="font-weight:bold;color:#fff176;font-size:0.88em;letter-spacing:0.09em;text-transform:uppercase;margin-bottom:10px;">🏜️ Monster Population — moc_fild17</div> | ||
<div style="display:grid;grid-template-columns:1fr 1fr;gap:10px;"> | <div style="display:grid;grid-template-columns:1fr 1fr;gap:10px;"> | ||
<div style="background:rgba(24,18,4,0.84);border:1px solid rgba(220,180,40,0.22);border-radius:9px;padding:11px 13px;position:relative;overflow:hidden;"> | <div style="background:rgba(24,18,4,0.84);border:1px solid rgba(220,180,40,0.22);border-radius:9px;padding:11px 13px;position:relative;overflow:hidden;"> | ||
| Line 481: | Line 440: | ||
<div style="background:rgba(22,16,4,0.85);border:1px solid rgba(200,160,30,0.28);border-radius:8px;overflow:hidden;"> | <div style="background:rgba(22,16,4,0.85);border:1px solid rgba(200,160,30,0.28);border-radius:8px;overflow:hidden;"> | ||
<div style="background:linear-gradient(90deg,rgba(200,160,30,0.22),transparent);padding:10px 14px;border-bottom:1px solid rgba(200,160,30,0.18);font-weight:bold;color:#ffd54f;font-size:0.88em;letter-spacing:0.06em;text-transform:uppercase;"> | <div style="background:linear-gradient(90deg,rgba(200,160,30,0.22),transparent);padding:10px 14px;border-bottom:1px solid rgba(200,160,30,0.18);font-weight:bold;color:#ffd54f;font-size:0.88em;letter-spacing:0.06em;text-transform:uppercase;">🛡 Sand Armor</div> | ||
<div style="padding:12px 14px;"> | <div style="padding:12px 14px;"> | ||
{{Item List|id=15001|item=Sand Armor|simple=yes}} | {{Item List|id=15001|item=Sand Armor|simple=yes}} | ||
| Line 498: | Line 457: | ||
<div style="background:rgba(22,16,4,0.85);border:1px solid rgba(200,160,30,0.28);border-radius:8px;overflow:hidden;"> | <div style="background:rgba(22,16,4,0.85);border:1px solid rgba(200,160,30,0.28);border-radius:8px;overflow:hidden;"> | ||
<div style="background:linear-gradient(90deg,rgba(200,160,30,0.22),transparent);padding:10px 14px;border-bottom:1px solid rgba(200,160,30,0.18);font-weight:bold;color:#ffd54f;font-size:0.88em;letter-spacing:0.06em;text-transform:uppercase;"> | <div style="background:linear-gradient(90deg,rgba(200,160,30,0.22),transparent);padding:10px 14px;border-bottom:1px solid rgba(200,160,30,0.18);font-weight:bold;color:#ffd54f;font-size:0.88em;letter-spacing:0.06em;text-transform:uppercase;">👟 Sand Shoes</div> | ||
<div style="padding:12px 14px;"> | <div style="padding:12px 14px;"> | ||
{{Item List|id=22001|item=Sand Shoes|simple=yes}} | {{Item List|id=22001|item=Sand Shoes|simple=yes}} | ||
| Line 515: | Line 474: | ||
<div style="background:rgba(22,16,4,0.85);border:1px solid rgba(200,160,30,0.28);border-radius:8px;overflow:hidden;"> | <div style="background:rgba(22,16,4,0.85);border:1px solid rgba(200,160,30,0.28);border-radius:8px;overflow:hidden;"> | ||
<div style="background:linear-gradient(90deg,rgba(200,160,30,0.22),transparent);padding:10px 14px;border-bottom:1px solid rgba(200,160,30,0.18);font-weight:bold;color:#ffd54f;font-size:0.88em;letter-spacing:0.06em;text-transform:uppercase;"> | <div style="background:linear-gradient(90deg,rgba(200,160,30,0.22),transparent);padding:10px 14px;border-bottom:1px solid rgba(200,160,30,0.18);font-weight:bold;color:#ffd54f;font-size:0.88em;letter-spacing:0.06em;text-transform:uppercase;">🧥 Sand Manteau</div> | ||
<div style="padding:12px 14px;"> | <div style="padding:12px 14px;"> | ||
{{Item List|id=20001|item=Sand Manteau|simple=yes}} | {{Item List|id=20001|item=Sand Manteau|simple=yes}} | ||
| Line 521: | Line 480: | ||
<div style="color:#78909c;font-size:0.78em;font-weight:bold;letter-spacing:0.08em;text-transform:uppercase;margin-bottom:8px;">Possible Random Options</div> | <div style="color:#78909c;font-size:0.78em;font-weight:bold;letter-spacing:0.08em;text-transform:uppercase;margin-bottom:8px;">Possible Random Options</div> | ||
<ul style="margin:0;padding:0 0 0 16px;color:#e8d8a0;font-size:0.87em;line-height:1.80;"> | <ul style="margin:0;padding:0 0 0 16px;color:#e8d8a0;font-size:0.87em;line-height:1.80;"> | ||
<li>Ranged damage received <span style="color:#546e7a;"> | <li>Ranged damage received <span style="color:#546e7a;">−1% ~ −3%</span></li> | ||
<li>Fire element resistance <span style="color:#546e7a;">+1% ~ +3%</span></li> | <li>Fire element resistance <span style="color:#546e7a;">+1% ~ +3%</span></li> | ||
<li>Earth element resistance <span style="color:#546e7a;">+1% ~ +3%</span></li> | <li>Earth element resistance <span style="color:#546e7a;">+1% ~ +3%</span></li> | ||
<li>Perfect Dodge <span style="color:#546e7a;">+1 ~ +3</span></li> | <li>Perfect Dodge <span style="color:#546e7a;">+1 ~ +3</span></li> | ||
<li>Flee <span style="color:#546e7a;">+1 ~ +5</span></li> | <li>Flee <span style="color:#546e7a;">+1 ~ +5</span></li> | ||
<li>HIT <span style="color:#546e7a;">-1 ~ | <li>HIT <span style="color:#546e7a;">-1 ~ −5</span></li> | ||
</ul> | </ul> | ||
</div> | </div> | ||
| Line 542: | Line 501: | ||
margin: 0 0 20px 0; | margin: 0 0 20px 0; | ||
"> | "> | ||
<div style="font-weight:bold;color:#ffd54f;font-size:0.92em;letter-spacing:0.06em;text-transform:uppercase;margin-bottom:12px;"> | <div style="font-weight:bold;color:#ffd54f;font-size:0.92em;letter-spacing:0.06em;text-transform:uppercase;margin-bottom:12px;">⬡ Full Set Effect (Armor + Shoes + Manteau)</div> | ||
<ul style="margin:0;padding:0 0 0 18px;color:#e8d8a0;font-size:0.92em;line-height:1.80;"> | <ul style="margin:0;padding:0 0 0 18px;color:#e8d8a0;font-size:0.92em;line-height:1.80;"> | ||
<li>Max HP +<strong style="color:#fff9c4;">8%</strong></li> | <li>Max HP +<strong style="color:#fff9c4;">8%</strong></li> | ||
<li>Ranged damage received | <li>Ranged damage received −<strong style="color:#fff9c4;">5%</strong></li> | ||
<li>Damage dealt to Fire element monsters +<strong style="color:#fff9c4;">10%</strong></li> | <li>Damage dealt to Fire element monsters +<strong style="color:#fff9c4;">10%</strong></li> | ||
<li>Resistance to status effects (Silence, Curse, Blind, Stun) +<strong style="color:#fff9c4;">20%</strong></li> | <li>Resistance to status effects (Silence, Curse, Blind, Stun) +<strong style="color:#fff9c4;">20%</strong></li> | ||
</ul> | </ul> | ||
<div style="margin-top:10px;padding-top:10px;border-top:1px solid rgba(200,160,30,0.20);color:#546e7a;font-size:0.82em;"> | <div style="margin-top:10px;padding-top:10px;border-top:1px solid rgba(200,160,30,0.20);color:#546e7a;font-size:0.82em;">⚠ Set bonuses are disabled on GvG / WoE flagged maps.</div> | ||
</div> | </div> | ||
=== Desert Item | === Desert Item Combo === | ||
<div style=" | <div style=" | ||
background: linear-gradient(135deg, rgba( | background: linear-gradient(135deg, rgba(30,20,4,0.95), rgba(18,12,2,0.98)); | ||
border: 2px solid rgba(220,180,30,0.40); | |||
border-left: 5px solid #fdd835; | |||
border: 2px solid rgba( | |||
border-left: 5px solid # | |||
border-radius: 8px; | border-radius: 8px; | ||
padding: 16px 20px; | padding: 16px 20px; | ||
| Line 599: | Line 522: | ||
position: relative; overflow: hidden; | position: relative; overflow: hidden; | ||
"> | "> | ||
<div style="position:absolute;top:0;right:0;width: | <div style="position:absolute;top:0;right:0;width:180px;height:100%;background:linear-gradient(270deg,rgba(220,180,30,0.07),transparent);pointer-events:none;"></div> | ||
<div style="font-weight:bold;color:#fff176;font-size:0.95em;letter-spacing:0.06em;text-transform:uppercase;margin-bottom:12px;">🔗 Scouring Wind Combo</div> | |||
<div style="font-weight:bold;color:#fff176;font-size:0.95em;letter-spacing:0.06em;text-transform:uppercase | |||
<div style="display:grid;grid-template-columns:auto 1fr;gap:12px;align-items:start;margin-bottom:14px;"> | <div style="display:grid;grid-template-columns:auto 1fr;gap:12px;align-items:start;margin-bottom:14px;"> | ||
<div style="color:#78909c;font-size:0.82em;font-weight:bold;text-transform:uppercase;padding-top:2px;">Items</div> | <div style="color:#78909c;font-size:0.82em;font-weight:bold;text-transform:uppercase;padding-top:2px;">Items</div> | ||
<div> | <div> | ||
{{Item List|id=15001|item=Sand Armor|simple=yes}} | {{Item List|id=15001|item=Sand Armor|simple=yes}} {{Item List|id=22001|item=Sand Shoes|simple=yes}} {{Item List|id=4377|item=Antique Firelock Card|simple=yes}} | ||
<div style="margin-top:6px;color:#90a4ae;font-size:0.88em;">(Antique Firelock Card in any piece of the set)</div> | |||
</div> | </div> | ||
</div> | </div> | ||
<div style="color:#78909c;font-size:0.82em;font-weight:bold;text-transform:uppercase;margin-bottom:8px;">Combo Effect</div> | <div style="color:#78909c;font-size:0.82em;font-weight:bold;text-transform:uppercase;margin-bottom:8px;">Combo Effect</div> | ||
<ul style="margin:0;padding:0 0 0 18px;color:#fff9c4;font-size:0.91em;line-height:1.80;"> | <ul style="margin:0;padding:0 0 0 18px;color:#fff9c4;font-size:0.91em;line-height:1.80;"> | ||
<li> | <li>DEF +<strong style="color:#fffde7;">8</strong></li> | ||
<li> | <li>Resistance to Silence and Blind +<strong style="color:#fffde7;">25%</strong></li> | ||
<li> | <li>Fire element resistance +<strong style="color:#fffde7;">10%</strong> additional</li> | ||
<li>When hit by ranged attacks: 8% chance to gain a <strong style="color:#fffde7;">+15 DEF</strong> shield for 4 seconds</li> | |||
</ul> | </ul> | ||
</div> | </div> | ||
| Line 626: | Line 543: | ||
<div style="background:rgba(22,16,4,0.88);border:1px solid rgba(200,160,30,0.25);border-radius:8px;padding:14px 18px;margin:0 0 8px 0;"> | <div style="background:rgba(22,16,4,0.88);border:1px solid rgba(200,160,30,0.25);border-radius:8px;padding:14px 18px;margin:0 0 8px 0;"> | ||
<div style="color:#78909c;font-size:0.80em;font-weight:bold;letter-spacing:0.08em;text-transform:uppercase;margin-bottom:8px;">Fever MVP Drop | <div style="color:#78909c;font-size:0.80em;font-weight:bold;letter-spacing:0.08em;text-transform:uppercase;margin-bottom:8px;">Fever MVP Drop — Sand Armor / Shoes / Manteau with Special Options</div> | ||
<ul style="margin:0;padding:0 0 0 18px;color:#e8d8a0;font-size:0.89em;line-height:1.75;"> | <ul style="margin:0;padding:0 0 0 18px;color:#e8d8a0;font-size:0.89em;line-height:1.75;"> | ||
<li>Damage against Demon race <span style="color:#546e7a;">+8% ~ +14%</span></li> | <li>Damage against Demon race <span style="color:#546e7a;">+8% ~ +14%</span></li> | ||
<li>Damage against Brute race <span style="color:#546e7a;">+6% ~ +11%</span></li> | <li>Damage against Brute race <span style="color:#546e7a;">+6% ~ +11%</span></li> | ||
<li>Ranged damage received <span style="color:#546e7a;"> | <li>Ranged damage received <span style="color:#546e7a;">−6% ~ −10%</span> additional</li> | ||
<li>Chance (8%) when hit: gain <strong style="color:#fff9c4;">+12 DEF</strong> for 5 seconds</li> | <li>Chance (8%) when hit: gain <strong style="color:#fff9c4;">+12 DEF</strong> for 5 seconds</li> | ||
<li>Fire element resistance <span style="color:#546e7a;">+6% ~ +10%</span> additional</li> | <li>Fire element resistance <span style="color:#546e7a;">+6% ~ +10%</span> additional</li> | ||
| Line 636: | Line 553: | ||
</div> | </div> | ||
<!-- | <!-- ═══════════════════════════════════════════════════════════ | ||
MAP 3 | MAP 3 — GLAST HEIM | ||
════════════════════════════════════════════════════════════ --> | |||
== Glast Heim Fever Dungeons == | == Glast Heim Fever Dungeons == | ||
| Line 644: | Line 561: | ||
<div style="background:linear-gradient(135deg,rgba(22,10,34,0.94),rgba(10,4,18,0.99));border:2px solid rgba(150,80,220,0.34);border-left:5px solid #ce93d8;border-radius:10px;padding:18px 22px 16px;margin:0 0 22px 0;position:relative;overflow:hidden;"> | <div style="background:linear-gradient(135deg,rgba(22,10,34,0.94),rgba(10,4,18,0.99));border:2px solid rgba(150,80,220,0.34);border-left:5px solid #ce93d8;border-radius:10px;padding:18px 22px 16px;margin:0 0 22px 0;position:relative;overflow:hidden;"> | ||
<div style="position:absolute;top:0;right:0;width:240px;height:100%;background:linear-gradient(270deg,rgba(206,147,216,0.10),transparent);pointer-events:none;"></div> | <div style="position:absolute;top:0;right:0;width:240px;height:100%;background:linear-gradient(270deg,rgba(206,147,216,0.10),transparent);pointer-events:none;"></div> | ||
<div style="position:absolute;bottom:-18px;right:24px;font-size:5em;opacity:0.045;pointer-events:none;line-height:1;"> | <div style="position:absolute;bottom:-18px;right:24px;font-size:5em;opacity:0.045;pointer-events:none;line-height:1;">🏚️</div> | ||
<div style="position:relative;z-index:1;color:#e1bee7;font-size:0.90em;line-height:1.65;"> | <div style="position:relative;z-index:1;color:#e1bee7;font-size:0.90em;line-height:1.65;"> | ||
The ruins of Glast Heim have collapsed inward, trapping wandering Undead and Demon entities within sealed catacombs. The Fever variants are driven by cursed dark energy | The ruins of Glast Heim have collapsed inward, trapping wandering Undead and Demon entities within sealed catacombs. The Fever variants are driven by cursed dark energy — applying <strong style="color:#ce93d8;">Shadow element damage, Curse status chains, and massive SP drain</strong>. The Shadow Set is built for Undead and Demon hunting specialists — maximizing SP efficiency and Shadow element resilience. | ||
[[File:kl_knt02_fever.png|250px]] | [[File:kl_knt02_fever.png|250px]] | ||
| Line 652: | Line 569: | ||
<div style="position:relative;z-index:1;margin-top:14px;background:rgba(18,8,30,0.64);border:1px solid rgba(150,80,220,0.18);border-radius:9px;padding:13px 15px;"> | <div style="position:relative;z-index:1;margin-top:14px;background:rgba(18,8,30,0.64);border:1px solid rgba(150,80,220,0.18);border-radius:9px;padding:13px 15px;"> | ||
<div style="font-weight:bold;color:#e1bee7;font-size:0.88em;letter-spacing:0.09em;text-transform:uppercase;margin-bottom:10px;"> | <div style="font-weight:bold;color:#e1bee7;font-size:0.88em;letter-spacing:0.09em;text-transform:uppercase;margin-bottom:10px;">🏚️ Monster Population — gl_knt02</div> | ||
<div style="display:grid;grid-template-columns:1fr 1fr;gap:10px;"> | <div style="display:grid;grid-template-columns:1fr 1fr;gap:10px;"> | ||
<div style="background:rgba(18,8,30,0.84);border:1px solid rgba(150,80,220,0.22);border-radius:9px;padding:11px 13px;position:relative;overflow:hidden;"> | <div style="background:rgba(18,8,30,0.84);border:1px solid rgba(150,80,220,0.22);border-radius:9px;padding:11px 13px;position:relative;overflow:hidden;"> | ||
| Line 689: | Line 606: | ||
<div style="position:relative;z-index:1;display:grid;grid-template-columns:1fr auto;gap:12px;align-items:center;"> | <div style="position:relative;z-index:1;display:grid;grid-template-columns:1fr auto;gap:12px;align-items:center;"> | ||
<div> | <div> | ||
<div style="font-weight:bold;color:#e57373;font-size:0.82em;letter-spacing:0.10em;text-transform:uppercase;margin-bottom:6px;"> | <div style="font-weight:bold;color:#e57373;font-size:0.82em;letter-spacing:0.10em;text-transform:uppercase;margin-bottom:6px;">👑 Fever MVP</div> | ||
<div>{{Monster|id=3074|name=Bloody Knight}}</div> | <div>{{Monster|id=3074|name=Bloody Knight}}</div> | ||
</div> | </div> | ||
| Line 710: | Line 627: | ||
<div style="background:rgba(12,6,22,0.85);border:1px solid rgba(130,60,200,0.28);border-radius:8px;overflow:hidden;"> | <div style="background:rgba(12,6,22,0.85);border:1px solid rgba(130,60,200,0.28);border-radius:8px;overflow:hidden;"> | ||
<div style="background:linear-gradient(90deg,rgba(130,60,200,0.22),transparent);padding:10px 14px;border-bottom:1px solid rgba(130,60,200,0.18);font-weight:bold;color:#ce93d8;font-size:0.88em;letter-spacing:0.06em;text-transform:uppercase;"> | <div style="background:linear-gradient(90deg,rgba(130,60,200,0.22),transparent);padding:10px 14px;border-bottom:1px solid rgba(130,60,200,0.18);font-weight:bold;color:#ce93d8;font-size:0.88em;letter-spacing:0.06em;text-transform:uppercase;">🛡 Shadow Armor</div> | ||
<div style="padding:12px 14px;"> | <div style="padding:12px 14px;"> | ||
{{Item List|id=15002|item=Shadow Armor|simple=yes}} | {{Item List|id=15002|item=Shadow Armor|simple=yes}} | ||
| Line 719: | Line 636: | ||
<li>Shadow element resistance <span style="color:#546e7a;">+5% ~ +10%</span></li> | <li>Shadow element resistance <span style="color:#546e7a;">+5% ~ +10%</span></li> | ||
<li>Undead element resistance <span style="color:#546e7a;">+4% ~ +9%</span></li> | <li>Undead element resistance <span style="color:#546e7a;">+4% ~ +9%</span></li> | ||
<li>Demon race damage received <span style="color:#546e7a;"> | <li>Demon race damage received <span style="color:#546e7a;">−3% ~ −6%</span></li> | ||
<li>VIT <span style="color:#546e7a;">+2 ~ +5</span></li> | <li>VIT <span style="color:#546e7a;">+2 ~ +5</span></li> | ||
<li>MDEF <span style="color:#546e7a;">+3 ~ +8</span></li> | <li>MDEF <span style="color:#546e7a;">+3 ~ +8</span></li> | ||
| Line 727: | Line 644: | ||
<div style="background:rgba(12,6,22,0.85);border:1px solid rgba(130,60,200,0.28);border-radius:8px;overflow:hidden;"> | <div style="background:rgba(12,6,22,0.85);border:1px solid rgba(130,60,200,0.28);border-radius:8px;overflow:hidden;"> | ||
<div style="background:linear-gradient(90deg,rgba(130,60,200,0.22),transparent);padding:10px 14px;border-bottom:1px solid rgba(130,60,200,0.18);font-weight:bold;color:#ce93d8;font-size:0.88em;letter-spacing:0.06em;text-transform:uppercase;"> | <div style="background:linear-gradient(90deg,rgba(130,60,200,0.22),transparent);padding:10px 14px;border-bottom:1px solid rgba(130,60,200,0.18);font-weight:bold;color:#ce93d8;font-size:0.88em;letter-spacing:0.06em;text-transform:uppercase;">👟 Shadow Shoes</div> | ||
<div style="padding:12px 14px;"> | <div style="padding:12px 14px;"> | ||
{{Item List|id=22002|item=Shadow Shoes|simple=yes}} | {{Item List|id=22002|item=Shadow Shoes|simple=yes}} | ||
| Line 735: | Line 652: | ||
<li>SP Recovery rate <span style="color:#546e7a;">+6% ~ +14%</span></li> | <li>SP Recovery rate <span style="color:#546e7a;">+6% ~ +14%</span></li> | ||
<li>Max SP % <span style="color:#546e7a;">+3% ~ +7%</span></li> | <li>Max SP % <span style="color:#546e7a;">+3% ~ +7%</span></li> | ||
<li>After-cast delay <span style="color:#546e7a;"> | <li>After-cast delay <span style="color:#546e7a;">−3% ~ −6%</span></li> | ||
<li>Flee <span style="color:#546e7a;">+4 ~ +10</span></li> | <li>Flee <span style="color:#546e7a;">+4 ~ +10</span></li> | ||
<li>INT <span style="color:#546e7a;">+2 ~ +4</span></li> | <li>INT <span style="color:#546e7a;">+2 ~ +4</span></li> | ||
| Line 744: | Line 661: | ||
<div style="background:rgba(12,6,22,0.85);border:1px solid rgba(130,60,200,0.28);border-radius:8px;overflow:hidden;"> | <div style="background:rgba(12,6,22,0.85);border:1px solid rgba(130,60,200,0.28);border-radius:8px;overflow:hidden;"> | ||
<div style="background:linear-gradient(90deg,rgba(130,60,200,0.22),transparent);padding:10px 14px;border-bottom:1px solid rgba(130,60,200,0.18);font-weight:bold;color:#ce93d8;font-size:0.88em;letter-spacing:0.06em;text-transform:uppercase;"> | <div style="background:linear-gradient(90deg,rgba(130,60,200,0.22),transparent);padding:10px 14px;border-bottom:1px solid rgba(130,60,200,0.18);font-weight:bold;color:#ce93d8;font-size:0.88em;letter-spacing:0.06em;text-transform:uppercase;">🧥 Shadow Manteau</div> | ||
<div style="padding:12px 14px;"> | <div style="padding:12px 14px;"> | ||
{{Item List|id=20002|item=Shadow Manteau|simple=yes}} | {{Item List|id=20002|item=Shadow Manteau|simple=yes}} | ||
| Line 751: | Line 668: | ||
<ul style="margin:0;padding:0 0 0 16px;color:#d0b8e0;font-size:0.87em;line-height:1.80;"> | <ul style="margin:0;padding:0 0 0 16px;color:#d0b8e0;font-size:0.87em;line-height:1.80;"> | ||
<li>Shadow element resistance <span style="color:#546e7a;">+4% ~ +8%</span></li> | <li>Shadow element resistance <span style="color:#546e7a;">+4% ~ +8%</span></li> | ||
<li>Undead race damage received <span style="color:#546e7a;"> | <li>Undead race damage received <span style="color:#546e7a;">−3% ~ −7%</span></li> | ||
<li>Demon race damage received <span style="color:#546e7a;"> | <li>Demon race damage received <span style="color:#546e7a;">−3% ~ −6%</span></li> | ||
<li>Perfect Dodge <span style="color:#546e7a;">+2 ~ +5</span></li> | <li>Perfect Dodge <span style="color:#546e7a;">+2 ~ +5</span></li> | ||
<li>Curse resistance <span style="color:#546e7a;">+20% ~ +40%</span></li> | <li>Curse resistance <span style="color:#546e7a;">+20% ~ +40%</span></li> | ||
<li>Magic damage received <span style="color:#546e7a;"> | <li>Magic damage received <span style="color:#546e7a;">−2% ~ +5%</span></li> | ||
</ul> | </ul> | ||
</div> | </div> | ||
| Line 771: | Line 688: | ||
margin: 0 0 20px 0; | margin: 0 0 20px 0; | ||
"> | "> | ||
<div style="font-weight:bold;color:#ce93d8;font-size:0.92em;letter-spacing:0.06em;text-transform:uppercase;margin-bottom:12px;"> | <div style="font-weight:bold;color:#ce93d8;font-size:0.92em;letter-spacing:0.06em;text-transform:uppercase;margin-bottom:12px;">⬡ Full Set Effect (Armor + Shoes + Manteau)</div> | ||
<ul style="margin:0;padding:0 0 0 18px;color:#d0b8e0;font-size:0.92em;line-height:1.80;"> | <ul style="margin:0;padding:0 0 0 18px;color:#d0b8e0;font-size:0.92em;line-height:1.80;"> | ||
<li>Damage received from Undead and Demon monsters | <li>Damage received from Undead and Demon monsters −<strong style="color:#e1bee7;">10%</strong></li> | ||
<li>Shadow element resistance +<strong style="color:#e1bee7;">10%</strong></li> | <li>Shadow element resistance +<strong style="color:#e1bee7;">10%</strong></li> | ||
<li>SP recovery +<strong style="color:#e1bee7;">20%</strong> inside Fever maps</li> | <li>SP recovery +<strong style="color:#e1bee7;">20%</strong> inside Fever maps</li> | ||
<li>Curse status duration received | <li>Curse status duration received −<strong style="color:#e1bee7;">50%</strong></li> | ||
</ul> | </ul> | ||
<div style="margin-top:10px;padding-top:10px;border-top:1px solid rgba(130,60,200,0.20);color:#546e7a;font-size:0.82em;"> | <div style="margin-top:10px;padding-top:10px;border-top:1px solid rgba(130,60,200,0.20);color:#546e7a;font-size:0.82em;">⚠ Set bonuses are disabled on GvG / WoE flagged maps.</div> | ||
</div> | </div> | ||
=== Glast Heim Item | === Glast Heim Item Combo === | ||
<div style=" | <div style=" | ||
background: linear-gradient(135deg, rgba( | background: linear-gradient(135deg, rgba(16,6,28,0.95), rgba(8,4,18,0.98)); | ||
border: 2px solid rgba( | border: 2px solid rgba(160,80,220,0.40); | ||
border-left: 5px solid # | border-left: 5px solid #9c27b0; | ||
border-radius: 8px; | border-radius: 8px; | ||
padding: 16px 20px; | padding: 16px 20px; | ||
| Line 828: | Line 709: | ||
position: relative; overflow: hidden; | position: relative; overflow: hidden; | ||
"> | "> | ||
<div style="position:absolute;top:0;right:0;width: | <div style="position:absolute;top:0;right:0;width:180px;height:100%;background:linear-gradient(270deg,rgba(130,60,200,0.07),transparent);pointer-events:none;"></div> | ||
<div style="font-weight:bold;color:#e040fb;font-size:0.95em;letter-spacing:0.06em;text-transform:uppercase;margin-bottom:12px;">🔗 Cursed Vault Combo</div> | |||
<div style="font-weight:bold;color:#e040fb;font-size:0.95em;letter-spacing:0.06em;text-transform:uppercase | |||
<div style="display:grid;grid-template-columns:auto 1fr;gap:12px;align-items:start;margin-bottom:14px;"> | <div style="display:grid;grid-template-columns:auto 1fr;gap:12px;align-items:start;margin-bottom:14px;"> | ||
<div style="color:#78909c;font-size:0.82em;font-weight:bold;text-transform:uppercase;padding-top:2px;">Items</div> | <div style="color:#78909c;font-size:0.82em;font-weight:bold;text-transform:uppercase;padding-top:2px;">Items</div> | ||
<div> | <div> | ||
{{Item List|id=20002|item=Shadow Manteau|simple=yes}} | {{Item List|id=15002|item=Shadow Armor|simple=yes}} {{Item List|id=20002|item=Shadow Manteau|simple=yes}} {{Item List|id=4064|item=Wraith Dead Card|simple=yes}} | ||
<div style="margin-top:6px;color:#90a4ae;font-size:0.88em;">(Wraith Dead Card in Shadow Manteau)</div> | |||
</div> | </div> | ||
</div> | </div> | ||
<div style="color:#78909c;font-size:0.82em;font-weight:bold;text-transform:uppercase;margin-bottom:8px;">Combo Effect</div> | <div style="color:#78909c;font-size:0.82em;font-weight:bold;text-transform:uppercase;margin-bottom:8px;">Combo Effect</div> | ||
<ul style="margin:0;padding:0 0 0 18px;color:#e1bee7;font-size:0.91em;line-height:1.80;"> | <ul style="margin:0;padding:0 0 0 18px;color:#e1bee7;font-size:0.91em;line-height:1.80;"> | ||
<li><strong style="color:#f3e5f5;">12% | <li>Shadow element resistance +<strong style="color:#f3e5f5;">12%</strong> additional</li> | ||
<li>When an Undead | <li>INT +<strong style="color:#f3e5f5;">4</strong></li> | ||
<li> | <li>When killing an Undead monster: 10% chance to recover <strong style="color:#f3e5f5;">5% Max SP</strong></li> | ||
<li>Curse status immunity inside Fever maps</li> | |||
</ul> | </ul> | ||
</div> | </div> | ||
| Line 855: | Line 730: | ||
<div style="background:rgba(12,6,22,0.88);border:1px solid rgba(130,60,200,0.25);border-radius:8px;padding:14px 18px;margin:0 0 8px 0;"> | <div style="background:rgba(12,6,22,0.88);border:1px solid rgba(130,60,200,0.25);border-radius:8px;padding:14px 18px;margin:0 0 8px 0;"> | ||
<div style="color:#78909c;font-size:0.80em;font-weight:bold;letter-spacing:0.08em;text-transform:uppercase;margin-bottom:8px;">Fever MVP Drop | <div style="color:#78909c;font-size:0.80em;font-weight:bold;letter-spacing:0.08em;text-transform:uppercase;margin-bottom:8px;">Fever MVP Drop — Shadow Armor / Shoes / Manteau with Special Options</div> | ||
<ul style="margin:0;padding:0 0 0 18px;color:#d0b8e0;font-size:0.89em;line-height:1.75;"> | <ul style="margin:0;padding:0 0 0 18px;color:#d0b8e0;font-size:0.89em;line-height:1.75;"> | ||
<li>Damage against Undead race <span style="color:#546e7a;">+8% ~ +14%</span></li> | <li>Damage against Undead race <span style="color:#546e7a;">+8% ~ +14%</span></li> | ||
| Line 866: | Line 741: | ||
</div> | </div> | ||
<!-- | <!-- ═══════════════════════════════════════════════════════════ | ||
MAP 4 | MAP 4 — MAGMA DUNGEON | ||
════════════════════════════════════════════════════════════ --> | |||
== Magma Dungeon Level 3 Fever Area == | == Magma Dungeon Level 3 Fever Area == | ||
| Line 874: | Line 749: | ||
<div style="background:linear-gradient(135deg,rgba(38,10,4,0.94),rgba(18,4,2,0.99));border:2px solid rgba(240,90,40,0.36);border-left:5px solid #f4511e;border-radius:10px;padding:18px 22px 16px;margin:0 0 22px 0;position:relative;overflow:hidden;"> | <div style="background:linear-gradient(135deg,rgba(38,10,4,0.94),rgba(18,4,2,0.99));border:2px solid rgba(240,90,40,0.36);border-left:5px solid #f4511e;border-radius:10px;padding:18px 22px 16px;margin:0 0 22px 0;position:relative;overflow:hidden;"> | ||
<div style="position:absolute;top:0;right:0;width:240px;height:100%;background:linear-gradient(270deg,rgba(244,81,30,0.11),transparent);pointer-events:none;"></div> | <div style="position:absolute;top:0;right:0;width:240px;height:100%;background:linear-gradient(270deg,rgba(244,81,30,0.11),transparent);pointer-events:none;"></div> | ||
<div style="position:absolute;bottom:-18px;right:24px;font-size:5em;opacity:0.045;pointer-events:none;line-height:1;"> | <div style="position:absolute;bottom:-18px;right:24px;font-size:5em;opacity:0.045;pointer-events:none;line-height:1;">🌋</div> | ||
<div style="position:relative;z-index:1;color:#ffccbc;font-size:0.90em;line-height:1.65;"> | <div style="position:relative;z-index:1;color:#ffccbc;font-size:0.90em;line-height:1.65;"> | ||
The deepest floors of Magma Dungeon have cracked open, and superheated Fire element creatures have flooded the tunnels. The Magma Set is the most <strong style="color:#ff8a65;">offensively-oriented Fever set</strong> | The deepest floors of Magma Dungeon have cracked open, and superheated Fire element creatures have flooded the tunnels. The Magma Set is the most <strong style="color:#ff8a65;">offensively-oriented Fever set</strong> — boosting ATK, MATK, Fire resistance, and ASPD for aggressive, sustained pressure in a kill-or-be-killed environment. | ||
[[File:mag_dun03_fever.png|250px]] | [[File:mag_dun03_fever.png|250px]] | ||
| Line 882: | Line 757: | ||
<div style="position:relative;z-index:1;margin-top:14px;background:rgba(32,8,4,0.64);border:1px solid rgba(240,90,40,0.18);border-radius:9px;padding:13px 15px;"> | <div style="position:relative;z-index:1;margin-top:14px;background:rgba(32,8,4,0.64);border:1px solid rgba(240,90,40,0.18);border-radius:9px;padding:13px 15px;"> | ||
<div style="font-weight:bold;color:#ffab91;font-size:0.88em;letter-spacing:0.09em;text-transform:uppercase;margin-bottom:10px;"> | <div style="font-weight:bold;color:#ffab91;font-size:0.88em;letter-spacing:0.09em;text-transform:uppercase;margin-bottom:10px;">🌋 Monster Population — mag_dun03</div> | ||
<div style="display:grid;grid-template-columns:1fr 1fr;gap:10px;"> | <div style="display:grid;grid-template-columns:1fr 1fr;gap:10px;"> | ||
<div style="background:rgba(32,8,4,0.84);border:1px solid rgba(240,90,40,0.22);border-radius:9px;padding:11px 13px;position:relative;overflow:hidden;"> | <div style="background:rgba(32,8,4,0.84);border:1px solid rgba(240,90,40,0.22);border-radius:9px;padding:11px 13px;position:relative;overflow:hidden;"> | ||
| Line 931: | Line 806: | ||
<div style="position:relative;z-index:1;display:grid;grid-template-columns:1fr auto;gap:12px;align-items:center;"> | <div style="position:relative;z-index:1;display:grid;grid-template-columns:1fr auto;gap:12px;align-items:center;"> | ||
<div> | <div> | ||
<div style="font-weight:bold;color:#ff9800;font-size:0.82em;letter-spacing:0.10em;text-transform:uppercase;margin-bottom:6px;"> | <div style="font-weight:bold;color:#ff9800;font-size:0.82em;letter-spacing:0.10em;text-transform:uppercase;margin-bottom:6px;">👑 Fever MVP</div> | ||
<div>{{Monster|id=3012|name=Searing Monarch}}</div> | <div>{{Monster|id=3012|name=Searing Monarch}}</div> | ||
</div> | </div> | ||
| Line 952: | Line 827: | ||
<div style="background:rgba(22,6,4,0.85);border:1px solid rgba(220,80,30,0.28);border-radius:8px;overflow:hidden;"> | <div style="background:rgba(22,6,4,0.85);border:1px solid rgba(220,80,30,0.28);border-radius:8px;overflow:hidden;"> | ||
<div style="background:linear-gradient(90deg,rgba(220,80,30,0.22),transparent);padding:10px 14px;border-bottom:1px solid rgba(220,80,30,0.18);font-weight:bold;color:#ff7043;font-size:0.88em;letter-spacing:0.06em;text-transform:uppercase;"> | <div style="background:linear-gradient(90deg,rgba(220,80,30,0.22),transparent);padding:10px 14px;border-bottom:1px solid rgba(220,80,30,0.18);font-weight:bold;color:#ff7043;font-size:0.88em;letter-spacing:0.06em;text-transform:uppercase;">🛡 Magma Armor</div> | ||
<div style="padding:12px 14px;"> | <div style="padding:12px 14px;"> | ||
{{Item List|id=15003|item=Magma Armor|simple=yes}} | {{Item List|id=15003|item=Magma Armor|simple=yes}} | ||
| Line 969: | Line 844: | ||
<div style="background:rgba(22,6,4,0.85);border:1px solid rgba(220,80,30,0.28);border-radius:8px;overflow:hidden;"> | <div style="background:rgba(22,6,4,0.85);border:1px solid rgba(220,80,30,0.28);border-radius:8px;overflow:hidden;"> | ||
<div style="background:linear-gradient(90deg,rgba(220,80,30,0.22),transparent);padding:10px 14px;border-bottom:1px solid rgba(220,80,30,0.18);font-weight:bold;color:#ff7043;font-size:0.88em;letter-spacing:0.06em;text-transform:uppercase;"> | <div style="background:linear-gradient(90deg,rgba(220,80,30,0.22),transparent);padding:10px 14px;border-bottom:1px solid rgba(220,80,30,0.18);font-weight:bold;color:#ff7043;font-size:0.88em;letter-spacing:0.06em;text-transform:uppercase;">👟 Magma Shoes</div> | ||
<div style="padding:12px 14px;"> | <div style="padding:12px 14px;"> | ||
{{Item List|id=22003|item=Magma Shoes|simple=yes}} | {{Item List|id=22003|item=Magma Shoes|simple=yes}} | ||
| Line 986: | Line 861: | ||
<div style="background:rgba(22,6,4,0.85);border:1px solid rgba(220,80,30,0.28);border-radius:8px;overflow:hidden;"> | <div style="background:rgba(22,6,4,0.85);border:1px solid rgba(220,80,30,0.28);border-radius:8px;overflow:hidden;"> | ||
<div style="background:linear-gradient(90deg,rgba(220,80,30,0.22),transparent);padding:10px 14px;border-bottom:1px solid rgba(220,80,30,0.18);font-weight:bold;color:#ff7043;font-size:0.88em;letter-spacing:0.06em;text-transform:uppercase;"> | <div style="background:linear-gradient(90deg,rgba(220,80,30,0.22),transparent);padding:10px 14px;border-bottom:1px solid rgba(220,80,30,0.18);font-weight:bold;color:#ff7043;font-size:0.88em;letter-spacing:0.06em;text-transform:uppercase;">🧥 Magma Manteau</div> | ||
<div style="padding:12px 14px;"> | <div style="padding:12px 14px;"> | ||
{{Item List|id=20003|item=Magma Manteau|simple=yes}} | {{Item List|id=20003|item=Magma Manteau|simple=yes}} | ||
| Line 994: | Line 869: | ||
<li>Fire element resistance <span style="color:#546e7a;">+4% ~ +9%</span></li> | <li>Fire element resistance <span style="color:#546e7a;">+4% ~ +9%</span></li> | ||
<li>Neutral element resistance <span style="color:#546e7a;">+2% ~ +5%</span></li> | <li>Neutral element resistance <span style="color:#546e7a;">+2% ~ +5%</span></li> | ||
<li>Melee damage received <span style="color:#546e7a;"> | <li>Melee damage received <span style="color:#546e7a;">−3% ~ −7%</span></li> | ||
<li>Critical rate <span style="color:#546e7a;">+3 ~ +7</span></li> | <li>Critical rate <span style="color:#546e7a;">+3 ~ +7</span></li> | ||
<li>ATK % <span style="color:#546e7a;">+2% ~ +5%</span></li> | <li>ATK % <span style="color:#546e7a;">+2% ~ +5%</span></li> | ||
| Line 1,013: | Line 888: | ||
margin: 0 0 20px 0; | margin: 0 0 20px 0; | ||
"> | "> | ||
<div style="font-weight:bold;color:#ff7043;font-size:0.92em;letter-spacing:0.06em;text-transform:uppercase;margin-bottom:12px;"> | <div style="font-weight:bold;color:#ff7043;font-size:0.92em;letter-spacing:0.06em;text-transform:uppercase;margin-bottom:12px;">⬡ Full Set Effect (Armor + Shoes + Manteau)</div> | ||
<ul style="margin:0;padding:0 0 0 18px;color:#e8c0b0;font-size:0.92em;line-height:1.80;"> | <ul style="margin:0;padding:0 0 0 18px;color:#e8c0b0;font-size:0.92em;line-height:1.80;"> | ||
<li>ATK +<strong style="color:#ffccbc;">20</strong> and MATK +<strong style="color:#ffccbc;">15</strong></li> | <li>ATK +<strong style="color:#ffccbc;">20</strong> and MATK +<strong style="color:#ffccbc;">15</strong></li> | ||
| Line 1,020: | Line 895: | ||
<li>Damage against Fire-element and Formless monsters +<strong style="color:#ffccbc;">8%</strong></li> | <li>Damage against Fire-element and Formless monsters +<strong style="color:#ffccbc;">8%</strong></li> | ||
</ul> | </ul> | ||
<div style="margin-top:10px;padding-top:10px;border-top:1px solid rgba(220,80,30,0.20);color:#546e7a;font-size:0.82em;"> | <div style="margin-top:10px;padding-top:10px;border-top:1px solid rgba(220,80,30,0.20);color:#546e7a;font-size:0.82em;">⚠ Set bonuses are disabled on GvG / WoE flagged maps.</div> | ||
</div> | </div> | ||
=== Magma Item | === Magma Item Combo === | ||
<div style=" | <div style=" | ||
background: linear-gradient(135deg, rgba( | background: linear-gradient(135deg, rgba(30,6,2,0.95), rgba(18,4,2,0.98)); | ||
border: 2px solid rgba( | border: 2px solid rgba(240,100,30,0.42); | ||
border-left: 5px solid #ff5722; | |||
border-left: 5px solid # | |||
border-radius: 8px; | border-radius: 8px; | ||
padding: 16px 20px; | padding: 16px 20px; | ||
| Line 1,070: | Line 909: | ||
position: relative; overflow: hidden; | position: relative; overflow: hidden; | ||
"> | "> | ||
<div style="position:absolute;top:0;right:0;width: | <div style="position:absolute;top:0;right:0;width:180px;height:100%;background:linear-gradient(270deg,rgba(220,80,30,0.08),transparent);pointer-events:none;"></div> | ||
<div style="font-weight:bold;color:#ff8a65;font-size:0.95em;letter-spacing:0.06em;text-transform:uppercase;margin-bottom:12px;">🔗 Magma Surge Combo</div> | |||
<div style="font-weight:bold;color:# | |||
<div style="display:grid;grid-template-columns:auto 1fr;gap:12px;align-items:start;margin-bottom:14px;"> | <div style="display:grid;grid-template-columns:auto 1fr;gap:12px;align-items:start;margin-bottom:14px;"> | ||
<div style="color:#78909c;font-size:0.82em;font-weight:bold;text-transform:uppercase;padding-top:2px;">Items</div> | <div style="color:#78909c;font-size:0.82em;font-weight:bold;text-transform:uppercase;padding-top:2px;">Items</div> | ||
<div> | <div> | ||
{{Item List|id=15003|item=Magma Armor|simple=yes}} | {{Item List|id=15003|item=Magma Armor|simple=yes}} {{Item List|id=20003|item=Magma Manteau|simple=yes}} {{Item List|id=4115|item=Agav Card|simple=yes}} | ||
<div style="margin-top:6px;color:#90a4ae;font-size:0.88em;">(Agav Card in Magma Armor)</div> | |||
</div> | </div> | ||
</div> | </div> | ||
<div style="color:#78909c;font-size:0.82em;font-weight:bold;text-transform:uppercase;margin-bottom:8px;">Combo Effect</div> | <div style="color:#78909c;font-size:0.82em;font-weight:bold;text-transform:uppercase;margin-bottom:8px;">Combo Effect</div> | ||
<ul style="margin:0;padding:0 0 0 18px;color:#ffccbc;font-size:0.91em;line-height:1.80;"> | <ul style="margin:0;padding:0 0 0 18px;color:#ffccbc;font-size:0.91em;line-height:1.80;"> | ||
<li> | <li>ATK +<strong style="color:#ffe0b2;">15</strong> additional</li> | ||
<li> | <li>Critical rate +<strong style="color:#ffe0b2;">5</strong></li> | ||
<li> | <li>When attacking with a Fire-element skill: 8% chance to trigger a <strong style="color:#ffe0b2;">burning aura</strong> — adds +12 ATK for 6 seconds</li> | ||
<li>Damage against Formless monsters +<strong style="color:#ffe0b2;">10%</strong> additional</li> | |||
</ul> | </ul> | ||
</div> | </div> | ||
| Line 1,097: | Line 930: | ||
<div style="background:rgba(22,6,4,0.88);border:1px solid rgba(220,80,30,0.25);border-radius:8px;padding:14px 18px;margin:0 0 8px 0;"> | <div style="background:rgba(22,6,4,0.88);border:1px solid rgba(220,80,30,0.25);border-radius:8px;padding:14px 18px;margin:0 0 8px 0;"> | ||
<div style="color:#78909c;font-size:0.80em;font-weight:bold;letter-spacing:0.08em;text-transform:uppercase;margin-bottom:8px;">Fever MVP Drop | <div style="color:#78909c;font-size:0.80em;font-weight:bold;letter-spacing:0.08em;text-transform:uppercase;margin-bottom:8px;">Fever MVP Drop — Magma Armor / Shoes / Manteau with Special Options</div> | ||
<ul style="margin:0;padding:0 0 0 18px;color:#e8c0b0;font-size:0.89em;line-height:1.75;"> | <ul style="margin:0;padding:0 0 0 18px;color:#e8c0b0;font-size:0.89em;line-height:1.75;"> | ||
<li>Damage against Fire-element monsters <span style="color:#546e7a;">+8% ~ +15%</span></li> | <li>Damage against Fire-element monsters <span style="color:#546e7a;">+8% ~ +15%</span></li> | ||
| Line 1,103: | Line 936: | ||
<li>Damage against Demon race <span style="color:#546e7a;">+5% ~ +10%</span></li> | <li>Damage against Demon race <span style="color:#546e7a;">+5% ~ +10%</span></li> | ||
<li>Fire element resistance <span style="color:#546e7a;">+6% ~ +10%</span> additional</li> | <li>Fire element resistance <span style="color:#546e7a;">+6% ~ +10%</span> additional</li> | ||
<li>Chance (8%) on attack: trigger burning aura | <li>Chance (8%) on attack: trigger burning aura — ATK +<strong style="color:#ffccbc;">18</strong> for 5 seconds</li> | ||
<li>ATK % or MATK % against Fever monsters <span style="color:#546e7a;">+5% ~ +9%</span></li> | <li>ATK % or MATK % against Fever monsters <span style="color:#546e7a;">+5% ~ +9%</span></li> | ||
</ul> | </ul> | ||
</div> | </div> | ||
<!-- | <!-- ═══════════════════════════════════════════════════════════ | ||
MAP 5 | MAP 5 — ABYSS LAKE | ||
════════════════════════════════════════════════════════════ --> | |||
== Abyss Lake Underground Cave Level 4 == | == Abyss Lake Underground Cave Level 4 == | ||
| Line 1,116: | Line 949: | ||
<div style="background:linear-gradient(135deg,rgba(8,18,42,0.94),rgba(4,8,24,0.99));border:2px solid rgba(60,150,240,0.34);border-left:5px solid #64b5f6;border-radius:10px;padding:18px 22px 16px;margin:0 0 22px 0;position:relative;overflow:hidden;"> | <div style="background:linear-gradient(135deg,rgba(8,18,42,0.94),rgba(4,8,24,0.99));border:2px solid rgba(60,150,240,0.34);border-left:5px solid #64b5f6;border-radius:10px;padding:18px 22px 16px;margin:0 0 22px 0;position:relative;overflow:hidden;"> | ||
<div style="position:absolute;top:0;right:0;width:240px;height:100%;background:linear-gradient(270deg,rgba(100,181,246,0.11),transparent);pointer-events:none;"></div> | <div style="position:absolute;top:0;right:0;width:240px;height:100%;background:linear-gradient(270deg,rgba(100,181,246,0.11),transparent);pointer-events:none;"></div> | ||
<div style="position:absolute;bottom:-18px;right:24px;font-size:5em;opacity:0.045;pointer-events:none;line-height:1;"> | <div style="position:absolute;bottom:-18px;right:24px;font-size:5em;opacity:0.045;pointer-events:none;line-height:1;">🐉</div> | ||
<div style="position:relative;z-index:1;color:#b3d4f8;font-size:0.90em;line-height:1.65;"> | <div style="position:relative;z-index:1;color:#b3d4f8;font-size:0.90em;line-height:1.65;"> | ||
The fourth level of the Abyss Lake Underground Cave is an ancient sealed cavern, home to massive Dragon-race creatures and skeletal constructs of enormous size. Boss-type monsters appear more frequently and hit far harder than surface variants. The Dragon & Bone Set rewards the bravest hunters with <strong style="color:#90caf9;">Dragon resistance, Boss damage mitigation, and critical power</strong> | The fourth level of the Abyss Lake Underground Cave is an ancient sealed cavern, home to massive Dragon-race creatures and skeletal constructs of enormous size. Boss-type monsters appear more frequently and hit far harder than surface variants. The Dragon & Bone Set rewards the bravest hunters with <strong style="color:#90caf9;">Dragon resistance, Boss damage mitigation, and critical power</strong> — and is the only set to ship with <strong style="color:#80deea;">two distinct item combos</strong>. | ||
[[File:abyss_04_fever.png|250px]] | [[File:abyss_04_fever.png|250px]] | ||
| Line 1,124: | Line 957: | ||
<div style="position:relative;z-index:1;margin-top:14px;background:rgba(6,14,34,0.64);border:1px solid rgba(60,150,240,0.18);border-radius:9px;padding:13px 15px;"> | <div style="position:relative;z-index:1;margin-top:14px;background:rgba(6,14,34,0.64);border:1px solid rgba(60,150,240,0.18);border-radius:9px;padding:13px 15px;"> | ||
<div style="font-weight:bold;color:#90caf9;font-size:0.88em;letter-spacing:0.09em;text-transform:uppercase;margin-bottom:10px;"> | <div style="font-weight:bold;color:#90caf9;font-size:0.88em;letter-spacing:0.09em;text-transform:uppercase;margin-bottom:10px;">🐉 Monster Population — abyss_04</div> | ||
<div style="display:grid;grid-template-columns:1fr 1fr;gap:10px;"> | <div style="display:grid;grid-template-columns:1fr 1fr;gap:10px;"> | ||
<div style="background:rgba(6,14,34,0.84);border:1px solid rgba(60,150,240,0.22);border-radius:9px;padding:11px 13px;position:relative;overflow:hidden;"> | <div style="background:rgba(6,14,34,0.84);border:1px solid rgba(60,150,240,0.22);border-radius:9px;padding:11px 13px;position:relative;overflow:hidden;"> | ||
| Line 1,167: | Line 1,000: | ||
<div style="position:relative;z-index:1;display:grid;grid-template-columns:1fr auto;gap:12px;align-items:center;"> | <div style="position:relative;z-index:1;display:grid;grid-template-columns:1fr auto;gap:12px;align-items:center;"> | ||
<div> | <div> | ||
<div style="font-weight:bold;color:#90caf9;font-size:0.82em;letter-spacing:0.10em;text-transform:uppercase;margin-bottom:6px;"> | <div style="font-weight:bold;color:#90caf9;font-size:0.82em;letter-spacing:0.10em;text-transform:uppercase;margin-bottom:6px;">👑 Fever MVP</div> | ||
<div>{{Monster|id=20618|name=Bone Detardeurus}}</div> | <div>{{Monster|id=20618|name=Bone Detardeurus}}</div> | ||
</div> | </div> | ||
| Line 1,188: | Line 1,021: | ||
<div style="background:rgba(4,12,26,0.85);border:1px solid rgba(40,140,220,0.28);border-radius:8px;overflow:hidden;"> | <div style="background:rgba(4,12,26,0.85);border:1px solid rgba(40,140,220,0.28);border-radius:8px;overflow:hidden;"> | ||
<div style="background:linear-gradient(90deg,rgba(40,140,220,0.22),transparent);padding:10px 14px;border-bottom:1px solid rgba(40,140,220,0.18);font-weight:bold;color:#64b5f6;font-size:0.88em;letter-spacing:0.06em;text-transform:uppercase;"> | <div style="background:linear-gradient(90deg,rgba(40,140,220,0.22),transparent);padding:10px 14px;border-bottom:1px solid rgba(40,140,220,0.18);font-weight:bold;color:#64b5f6;font-size:0.88em;letter-spacing:0.06em;text-transform:uppercase;">🛡 Dragonbone Armor</div> | ||
<div style="padding:12px 14px;"> | <div style="padding:12px 14px;"> | ||
{{Item List|id=15004|item=Dragonbone Armor|simple=yes}} | {{Item List|id=15004|item=Dragonbone Armor|simple=yes}} | ||
| Line 1,196: | Line 1,029: | ||
<li>Max HP % <span style="color:#546e7a;">+3% ~ +10%</span></li> | <li>Max HP % <span style="color:#546e7a;">+3% ~ +10%</span></li> | ||
<li>DEF <span style="color:#546e7a;">+2 ~ +7</span></li> | <li>DEF <span style="color:#546e7a;">+2 ~ +7</span></li> | ||
<li>Boss race damage received <span style="color:#546e7a;"> | <li>Boss race damage received <span style="color:#546e7a;">−2% ~ −6%</span></li> | ||
<li>AGI <span style="color:#546e7a;">+1 ~ +4</span></li> | <li>AGI <span style="color:#546e7a;">+1 ~ +4</span></li> | ||
<li>ATK <span style="color:#546e7a;">+3 ~ +15</span></li> | <li>ATK <span style="color:#546e7a;">+3 ~ +15</span></li> | ||
| Line 1,205: | Line 1,038: | ||
<div style="background:rgba(4,12,26,0.85);border:1px solid rgba(40,140,220,0.28);border-radius:8px;overflow:hidden;"> | <div style="background:rgba(4,12,26,0.85);border:1px solid rgba(40,140,220,0.28);border-radius:8px;overflow:hidden;"> | ||
<div style="background:linear-gradient(90deg,rgba(40,140,220,0.22),transparent);padding:10px 14px;border-bottom:1px solid rgba(40,140,220,0.18);font-weight:bold;color:#64b5f6;font-size:0.88em;letter-spacing:0.06em;text-transform:uppercase;"> | <div style="background:linear-gradient(90deg,rgba(40,140,220,0.22),transparent);padding:10px 14px;border-bottom:1px solid rgba(40,140,220,0.18);font-weight:bold;color:#64b5f6;font-size:0.88em;letter-spacing:0.06em;text-transform:uppercase;">👟 Dragonbone Shoes</div> | ||
<div style="padding:12px 14px;"> | <div style="padding:12px 14px;"> | ||
{{Item List|id=22004|item=Dragonbone Shoes|simple=yes}} | {{Item List|id=22004|item=Dragonbone Shoes|simple=yes}} | ||
| Line 1,222: | Line 1,055: | ||
<div style="background:rgba(4,12,26,0.85);border:1px solid rgba(40,140,220,0.28);border-radius:8px;overflow:hidden;"> | <div style="background:rgba(4,12,26,0.85);border:1px solid rgba(40,140,220,0.28);border-radius:8px;overflow:hidden;"> | ||
<div style="background:linear-gradient(90deg,rgba(40,140,220,0.22),transparent);padding:10px 14px;border-bottom:1px solid rgba(40,140,220,0.18);font-weight:bold;color:#64b5f6;font-size:0.88em;letter-spacing:0.06em;text-transform:uppercase;"> | <div style="background:linear-gradient(90deg,rgba(40,140,220,0.22),transparent);padding:10px 14px;border-bottom:1px solid rgba(40,140,220,0.18);font-weight:bold;color:#64b5f6;font-size:0.88em;letter-spacing:0.06em;text-transform:uppercase;">🧥 Dragonbone Manteau</div> | ||
<div style="padding:12px 14px;"> | <div style="padding:12px 14px;"> | ||
{{Item List|id=20004|item=Dragonbone Manteau|simple=yes}} | {{Item List|id=20004|item=Dragonbone Manteau|simple=yes}} | ||
| Line 1,228: | Line 1,061: | ||
<div style="color:#78909c;font-size:0.78em;font-weight:bold;letter-spacing:0.08em;text-transform:uppercase;margin-bottom:8px;">Possible Random Options</div> | <div style="color:#78909c;font-size:0.78em;font-weight:bold;letter-spacing:0.08em;text-transform:uppercase;margin-bottom:8px;">Possible Random Options</div> | ||
<ul style="margin:0;padding:0 0 0 16px;color:#b0c8e8;font-size:0.87em;line-height:1.80;"> | <ul style="margin:0;padding:0 0 0 16px;color:#b0c8e8;font-size:0.87em;line-height:1.80;"> | ||
<li>Ranged damage dealt <span style="color:#546e7a;"> | <li>Ranged damage dealt <span style="color:#546e7a;">1% ~ 7%</span></li> | ||
<li>Boss race damage received <span style="color:#546e7a;"> | <li>Boss race damage received <span style="color:#546e7a;">−1% ~ -7%</span></li> | ||
<li>Critical damage <span style="color:#546e7a;">+3% ~ +10%</span></li> | <li>Critical damage <span style="color:#546e7a;">+3% ~ +10%</span></li> | ||
<li>Perfect Dodge <span style="color:#546e7a;">+2 ~ +5</span></li> | <li>Perfect Dodge <span style="color:#546e7a;">+2 ~ +5</span></li> | ||
<li>FLEE <span style="color:#546e7a;"> | <li>FLEE <span style="color:#546e7a;">3 ~ 15</span></li> | ||
<li>HIT <span style="color:#546e7a;">+1 ~ +10</span></li> | <li>HIT <span style="color:#546e7a;">+1 ~ +10</span></li> | ||
</ul> | </ul> | ||
| Line 1,249: | Line 1,082: | ||
margin: 0 0 20px 0; | margin: 0 0 20px 0; | ||
"> | "> | ||
<div style="font-weight:bold;color:#64b5f6;font-size:0.92em;letter-spacing:0.06em;text-transform:uppercase;margin-bottom:12px;"> | <div style="font-weight:bold;color:#64b5f6;font-size:0.92em;letter-spacing:0.06em;text-transform:uppercase;margin-bottom:12px;">⬡ Full Set Effect (Armor + Shoes + Manteau)</div> | ||
<ul style="margin:0;padding:0 0 0 18px;color:#b0c8e8;font-size:0.92em;line-height:1.80;"> | <ul style="margin:0;padding:0 0 0 18px;color:#b0c8e8;font-size:0.92em;line-height:1.80;"> | ||
<li>Dragon race damage received | <li>Dragon race damage received −<strong style="color:#e3f2fd;">15%</strong></li> | ||
<li>Boss race damage received | <li>Boss race damage received −<strong style="color:#e3f2fd;">5%</strong></li> | ||
<li>Critical rate +<strong style="color:#e3f2fd;">8</strong> and Critical damage +<strong style="color:#e3f2fd;">5%</strong></li> | <li>Critical rate +<strong style="color:#e3f2fd;">8</strong> and Critical damage +<strong style="color:#e3f2fd;">5%</strong> </li> | ||
<li>Dragon Slayer effect: 1% chance | <li>Dragon Slayer effect: 1% chance summons a <strong style="color:#e3f2fd;">Dragon Spirit</strong> — adds +15 ATK for 5 seconds</li> | ||
</ul> | </ul> | ||
<div style="margin-top:10px;padding-top:10px;border-top:1px solid rgba(40,140,220,0.20);color:#546e7a;font-size:0.82em;"> | <div style="margin-top:10px;padding-top:10px;border-top:1px solid rgba(40,140,220,0.20);color:#546e7a;font-size:0.82em;">⚠ Set bonuses are disabled on GvG / WoE flagged maps.</div> | ||
</div> | </div> | ||
=== Abyss Lake Item Combos === | === Abyss Lake Item Combos === | ||
<div style=" | <div style=" | ||
background: linear-gradient(135deg, rgba(4, | background: linear-gradient(90deg,rgba(40,140,220,0.10),rgba(0,188,212,0.06)); | ||
border: 2px solid rgba(40, | border: 1px solid rgba(40,140,220,0.22); | ||
border-left: 5px solid # | border-radius: 8px; | ||
padding: 10px 16px; | |||
margin: 0 0 14px 0; | |||
font-size: 0.84em; color: #80deea; letter-spacing: 0.04em; | |||
"> | |||
⚠ <strong>Abyss Lake is the only Fever map with two distinct item combos.</strong> Both can be active simultaneously if all items are equipped. They do <em>not</em> conflict. | |||
</div> | |||
<div style=" | |||
background: linear-gradient(135deg, rgba(4,14,30,0.95), rgba(2,8,20,0.98)); | |||
border: 2px solid rgba(40,180,220,0.42); | |||
border-left: 5px solid #0288d1; | |||
border-radius: 8px; | border-radius: 8px; | ||
padding: 16px 20px; | padding: 16px 20px; | ||
| Line 1,271: | Line 1,114: | ||
position: relative; overflow: hidden; | position: relative; overflow: hidden; | ||
"> | "> | ||
<div style="position:absolute;top:0;right:0;width:180px;height:100%;background:linear-gradient(270deg,rgba(40, | <div style="position:absolute;top:0;right:0;width:180px;height:100%;background:linear-gradient(270deg,rgba(40,140,220,0.08),transparent);pointer-events:none;"></div> | ||
<div style="font-weight:bold;color:#4fc3f7;font-size:0.95em;letter-spacing:0.06em;text-transform:uppercase;margin-bottom:12px;">🔗 Combo I — Ancient Scale Combo</div> | |||
<div style="font-weight:bold;color:# | |||
<div style="display:grid;grid-template-columns:auto 1fr;gap:12px;align-items:start;margin-bottom:14px;"> | <div style="display:grid;grid-template-columns:auto 1fr;gap:12px;align-items:start;margin-bottom:14px;"> | ||
<div style="color:#78909c;font-size:0.82em;font-weight:bold;text-transform:uppercase;padding-top:2px;">Items</div> | <div style="color:#78909c;font-size:0.82em;font-weight:bold;text-transform:uppercase;padding-top:2px;">Items</div> | ||
<div> | <div> | ||
{{Item List|id= | {{Item List|id=15004|item=Dragonbone Armor|simple=yes}} {{Item List|id=22004|item=Dragonbone Shoes|simple=yes}} {{Item List|id=4319|item=Dragon Tail Card|simple=yes}} | ||
<div style="margin-top:6px;color:#90a4ae;font-size:0.88em;">(Dragon Tail Card in Dragonbone Shoes)</div> | |||
</div> | </div> | ||
</div> | </div> | ||
<div style="color:#78909c;font-size:0.82em;font-weight:bold;text-transform:uppercase;margin-bottom:8px;">Combo Effect</div> | <div style="color:#78909c;font-size:0.82em;font-weight:bold;text-transform:uppercase;margin-bottom:8px;">Combo Effect</div> | ||
<ul style="margin:0;padding:0 0 0 18px;color:#b3d4f8;font-size:0.91em;line-height:1.80;"> | <ul style="margin:0;padding:0 0 0 18px;color:#b3d4f8;font-size:0.91em;line-height:1.80;"> | ||
<li> | <li>Dragon race damage received −<strong style="color:#e1f5fe;">10%</strong> additional</li> | ||
<li> | <li>AGI +<strong style="color:#e1f5fe;">4</strong></li> | ||
<li> | <li>Critical rate +<strong style="color:#e1f5fe;">6</strong> additional</li> | ||
<li>Chance (10%) on critical hit: Dragon Slayer effect activates immediately (ATK +20 for 8s)</li> | |||
</ul> | </ul> | ||
</div> | </div> | ||
<div style=" | <div style=" | ||
background: linear-gradient(135deg, rgba(4,14, | background: linear-gradient(135deg, rgba(4,14,30,0.95), rgba(2,8,20,0.98)); | ||
border: 2px solid rgba(0, | border: 2px solid rgba(0,180,200,0.42); | ||
border-left: 5px solid # | border-left: 5px solid #00acc1; | ||
border-radius: 8px; | border-radius: 8px; | ||
padding: 16px 20px; | padding: 16px 20px; | ||
| Line 1,306: | Line 1,141: | ||
position: relative; overflow: hidden; | position: relative; overflow: hidden; | ||
"> | "> | ||
<div style="position:absolute;top:0;right:0;width: | <div style="position:absolute;top:0;right:0;width:180px;height:100%;background:linear-gradient(270deg,rgba(0,180,200,0.08),transparent);pointer-events:none;"></div> | ||
<div style="font-weight:bold;color:#4dd0e1;font-size:0.95em;letter-spacing:0.06em;text-transform:uppercase;margin-bottom:12px;">🔗 Combo II — Bone Tyrant Combo</div> | |||
<div style="font-weight:bold;color:# | |||
<div style="display:grid;grid-template-columns:auto 1fr;gap:12px;align-items:start;margin-bottom:14px;"> | <div style="display:grid;grid-template-columns:auto 1fr;gap:12px;align-items:start;margin-bottom:14px;"> | ||
<div style="color:#78909c;font-size:0.82em;font-weight:bold;text-transform:uppercase;padding-top:2px;">Items</div> | <div style="color:#78909c;font-size:0.82em;font-weight:bold;text-transform:uppercase;padding-top:2px;">Items</div> | ||
<div> | <div> | ||
{{Item List|id=15004|item=Dragonbone Armor|simple=yes}} | {{Item List|id=15004|item=Dragonbone Armor|simple=yes}} {{Item List|id=20004|item=Dragonbone Manteau|simple=yes}} {{Item List|id=4121|item=Ancient Mimic Card|simple=yes}} | ||
<div style="margin-top:6px;color:#90a4ae;font-size:0.88em;">(Ancient Mimic Card in Dragonbone Manteau)</div> | |||
<div style="margin-top: | |||
</div> | |||
</div> | </div> | ||
</div> | </div> | ||
<div style="color:#78909c;font-size:0.82em;font-weight:bold;text-transform:uppercase;margin-bottom:8px;">Combo Effect</div> | <div style="color:#78909c;font-size:0.82em;font-weight:bold;text-transform:uppercase;margin-bottom:8px;">Combo Effect</div> | ||
<ul style="margin:0;padding:0 0 0 18px;color:# | <ul style="margin:0;padding:0 0 0 18px;color:#b3e8f0;font-size:0.91em;line-height:1.80;"> | ||
<li> | <li>Boss race damage received −<strong style="color:#e0f7fa;">8%</strong> additional</li> | ||
<li> | <li>Critical damage +<strong style="color:#e0f7fa;">8%</strong> additional</li> | ||
<li>Max HP <strong style="color:# | <li>STR +<strong style="color:#e0f7fa;">4</strong></li> | ||
<li>When fighting Boss-type monsters: Max HP +<strong style="color:#e0f7fa;">5%</strong> passive bonus</li> | |||
</ul> | </ul> | ||
</div> | </div> | ||
| Line 1,337: | Line 1,162: | ||
<div style="background:rgba(4,12,26,0.88);border:1px solid rgba(40,140,220,0.25);border-radius:8px;padding:14px 18px;margin:0 0 8px 0;"> | <div style="background:rgba(4,12,26,0.88);border:1px solid rgba(40,140,220,0.25);border-radius:8px;padding:14px 18px;margin:0 0 8px 0;"> | ||
<div style="color:#78909c;font-size:0.80em;font-weight:bold;letter-spacing:0.08em;text-transform:uppercase;margin-bottom:8px;">Fever MVP Drop | <div style="color:#78909c;font-size:0.80em;font-weight:bold;letter-spacing:0.08em;text-transform:uppercase;margin-bottom:8px;">Fever MVP Drop — Dragonbone Armor / Shoes / Manteau with Special Options</div> | ||
<ul style="margin:0;padding:0 0 0 18px;color:#b0c8e8;font-size:0.89em;line-height:1.75;"> | <ul style="margin:0;padding:0 0 0 18px;color:#b0c8e8;font-size:0.89em;line-height:1.75;"> | ||
<li>Damage against Dragon race <span style="color:#546e7a;">+10% ~ +16%</span></li> | <li>Damage against Dragon race <span style="color:#546e7a;">+10% ~ +16%</span></li> | ||
<li>Damage against Boss-type monsters <span style="color:#546e7a;">+3% ~ +10%</span></li> | <li>Damage against Boss-type monsters <span style="color:#546e7a;">+3% ~ +10%</span></li> | ||
<li>Critical damage <span style="color:#546e7a;">+8% ~ +14%</span> additional</li> | <li>Critical damage <span style="color:#546e7a;">+8% ~ +14%</span> additional</li> | ||
<li>Dragon race damage received <span style="color:#546e7a;"> | <li>Dragon race damage received <span style="color:#546e7a;">−6% ~ +11%</span> additional</li> | ||
<li>Neutral element resistance <span style="color:#546e7a;">+5% ~ +9%</span> additional</li> | <li>Neutral element resistance <span style="color:#546e7a;">+5% ~ +9%</span> additional</li> | ||
<li>Chance (5%) on critical hit: Dragon Slayer effect activates | <li>Chance (5%) on critical hit: Dragon Slayer effect activates — ATK +<strong style="color:#e3f2fd;">15</strong> for 10 seconds</li> | ||
</ul> | </ul> | ||
</div> | </div> | ||
<!-- | <!-- ═══════════════════════════════════════════════════════════ | ||
MASTER SUMMARY | MASTER SUMMARY | ||
════════════════════════════════════════════════════════════ --> | |||
== System Reference == | == System Reference == | ||
| Line 1,371: | Line 1,196: | ||
! style="background:rgba(0,0,0,0.50); color:#b0b8d0; padding:11px 14px; text-align:left; font-size:0.83em; letter-spacing:0.08em; border-bottom:1px solid rgba(255,255,255,0.08);" | Material Drops | ! style="background:rgba(0,0,0,0.50); color:#b0b8d0; padding:11px 14px; text-align:left; font-size:0.83em; letter-spacing:0.08em; border-bottom:1px solid rgba(255,255,255,0.08);" | Material Drops | ||
|- | |- | ||
| style="padding:11px 14px; border-bottom:1px solid rgba(255,255,255,0.04); color:#c8e6c9;" | | | style="padding:11px 14px; border-bottom:1px solid rgba(255,255,255,0.04); color:#c8e6c9;" | 🌿 Payon Forest Fever Field | ||
| style="padding:11px 14px; border-bottom:1px solid rgba(255,255,255,0.04); color:#e0e8e0;" | Forest Set | | style="padding:11px 14px; border-bottom:1px solid rgba(255,255,255,0.04); color:#e0e8e0;" | Forest Set | ||
| style="padding:11px 14px; border-bottom:1px solid rgba(255,255,255,0.04); color:#90a0a0; font-size:0.89em;" | Survival | | style="padding:11px 14px; border-bottom:1px solid rgba(255,255,255,0.04); color:#90a0a0; font-size:0.89em;" | Survival · HP Recovery · Poison/Earth Resist | ||
| style="padding:11px 14px; border-bottom:1px solid rgba(255,255,255,0.04);" | <span style="color:#81c784 | | style="padding:11px 14px; border-bottom:1px solid rgba(255,255,255,0.04);" | <span style="color:#81c784;">1</span> — Blight Warden | ||
| style="padding:11px 14px; border-bottom:1px solid rgba(255,255,255,0.04); color:#b0b8c8; font-size:0.86em;" | Fragment | | style="padding:11px 14px; border-bottom:1px solid rgba(255,255,255,0.04); color:#b0b8c8; font-size:0.86em;" | Fragment · Shard · Stone | ||
|- | |- | ||
| style="padding:11px 14px; border-bottom:1px solid rgba(255,255,255,0.04); color:#fff9c4;" | | | style="padding:11px 14px; border-bottom:1px solid rgba(255,255,255,0.04); color:#fff9c4;" | 🏜️ Sograt Desert Fever Field | ||
| style="padding:11px 14px; border-bottom:1px solid rgba(255,255,255,0.04); color:#e8e0d0;" | Sand Set | | style="padding:11px 14px; border-bottom:1px solid rgba(255,255,255,0.04); color:#e8e0d0;" | Sand Set | ||
| style="padding:11px 14px; border-bottom:1px solid rgba(255,255,255,0.04); color:#90a0a0; font-size:0.89em;" | Endurance | | style="padding:11px 14px; border-bottom:1px solid rgba(255,255,255,0.04); color:#90a0a0; font-size:0.89em;" | Endurance · Ranged Defense · Fire/Status Resist | ||
| style="padding:11px 14px; border-bottom:1px solid rgba(255,255,255,0.04);" | <span style="color:#ffd54f | | style="padding:11px 14px; border-bottom:1px solid rgba(255,255,255,0.04);" | <span style="color:#ffd54f;">1</span> — Scouring Wind | ||
| style="padding:11px 14px; border-bottom:1px solid rgba(255,255,255,0.04); color:#b0b8c8; font-size:0.86em;" | Fragment | | style="padding:11px 14px; border-bottom:1px solid rgba(255,255,255,0.04); color:#b0b8c8; font-size:0.86em;" | Fragment · Shard · Stone | ||
|- | |- | ||
| style="padding:11px 14px; border-bottom:1px solid rgba(255,255,255,0.04); color:#e1bee7;" | | | style="padding:11px 14px; border-bottom:1px solid rgba(255,255,255,0.04); color:#e1bee7;" | 🏚️ Glast Heim Fever Dungeons | ||
| style="padding:11px 14px; border-bottom:1px solid rgba(255,255,255,0.04); color:#e0d8e8;" | Shadow Set | | style="padding:11px 14px; border-bottom:1px solid rgba(255,255,255,0.04); color:#e0d8e8;" | Shadow Set | ||
| style="padding:11px 14px; border-bottom:1px solid rgba(255,255,255,0.04); color:#90a0a0; font-size:0.89em;" | Undead/Demon | | style="padding:11px 14px; border-bottom:1px solid rgba(255,255,255,0.04); color:#90a0a0; font-size:0.89em;" | Undead/Demon · Shadow Resist · SP Recovery | ||
| style="padding:11px 14px; border-bottom:1px solid rgba(255,255,255,0.04);" | <span style="color:#ce93d8 | | style="padding:11px 14px; border-bottom:1px solid rgba(255,255,255,0.04);" | <span style="color:#ce93d8;">1</span> — Cursed Vault | ||
| style="padding:11px 14px; border-bottom:1px solid rgba(255,255,255,0.04); color:#b0b8c8; font-size:0.86em;" | Fragment | | style="padding:11px 14px; border-bottom:1px solid rgba(255,255,255,0.04); color:#b0b8c8; font-size:0.86em;" | Fragment · Shard · Stone | ||
|- | |- | ||
| style="padding:11px 14px; border-bottom:1px solid rgba(255,255,255,0.04); color:#ffccbc;" | | | style="padding:11px 14px; border-bottom:1px solid rgba(255,255,255,0.04); color:#ffccbc;" | 🌋 Magma Dungeon Level 3 | ||
| style="padding:11px 14px; border-bottom:1px solid rgba(255,255,255,0.04); color:#e8d0c8;" | Magma Set | | style="padding:11px 14px; border-bottom:1px solid rgba(255,255,255,0.04); color:#e8d0c8;" | Magma Set | ||
| style="padding:11px 14px; border-bottom:1px solid rgba(255,255,255,0.04); color:#90a0a0; font-size:0.89em;" | ATK/MATK Pressure | | style="padding:11px 14px; border-bottom:1px solid rgba(255,255,255,0.04); color:#90a0a0; font-size:0.89em;" | ATK/MATK Pressure · ASPD · Fire Offense | ||
| style="padding:11px 14px; border-bottom:1px solid rgba(255,255,255,0.04);" | <span style="color:#ff7043 | | style="padding:11px 14px; border-bottom:1px solid rgba(255,255,255,0.04);" | <span style="color:#ff7043;">1</span> — Magma Surge | ||
| style="padding:11px 14px; border-bottom:1px solid rgba(255,255,255,0.04); color:#b0b8c8; font-size:0.86em;" | Fragment | | style="padding:11px 14px; border-bottom:1px solid rgba(255,255,255,0.04); color:#b0b8c8; font-size:0.86em;" | Fragment · Shard · Stone | ||
|- | |- | ||
| style="padding:11px 14px; color:#b3d4f8;" | | | style="padding:11px 14px; color:#b3d4f8;" | 🐉 Abyss Lake Cave Level 4 | ||
| style="padding:11px 14px; color:#c8d8e8;" | Dragon & Bone Set | | style="padding:11px 14px; color:#c8d8e8;" | Dragon & Bone Set | ||
| style="padding:11px 14px; color:#90a0a0; font-size:0.89em;" | Dragon/Boss Hunting | | style="padding:11px 14px; color:#90a0a0; font-size:0.89em;" | Dragon/Boss Hunting · Critical · High-End PvM | ||
| style="padding:11px 14px;" | <span style="color:#64b5f6 | | style="padding:11px 14px;" | <span style="color:#64b5f6;">2</span> — Ancient Scale + Bone Tyrant | ||
| style="padding:11px 14px; color:#b0b8c8; font-size:0.86em;" | Fragment | | style="padding:11px 14px; color:#b0b8c8; font-size:0.86em;" | Fragment · Shard · Stone | ||
|} | |} | ||
</div> | </div> | ||
| Line 1,487: | Line 1,263: | ||
| style="padding:11px 14px; border-bottom:1px solid rgba(255,255,255,0.04); color:#ffd54f;">Enhanced | | style="padding:11px 14px; border-bottom:1px solid rgba(255,255,255,0.04); color:#ffd54f;">Enhanced | ||
|- | |- | ||
| style="padding:11px 14px | | style="padding:11px 14px; color:#e0e0e0;" | Item Combo Set Bonuses | ||
| style="padding:11px 14px | | style="padding:11px 14px; color:#a0b0c0; font-size:0.89em;" | Card + Set combination | ||
| style="padding:11px 14px | | style="padding:11px 14px; color:#ff8a65;">Powerful | ||
|} | |} | ||
</div> | </div> | ||
| Line 1,508: | Line 1,280: | ||
line-height: 1.70; | line-height: 1.70; | ||
"> | "> | ||
⚠ <strong style="color:#ef9a9a;">Reminder:</strong> All Fever set bonuses and item combo effects are <strong style="color:#e57373;">disabled on GvG, WoE, Castle, and Guild War flagged maps.</strong> Equipment may still be worn — only the Fever-specific bonuses are suppressed. Plan your gear loadout accordingly if you participate in competitive content. | |||
</div> | </div> | ||
Revision as of 02:13, 27 May 2026
Core Fever Rules
🔥
Random Options
Every piece of equipment that drops inside a Fever map — armor, shoes, manteau, and boss drops — always comes with random stat options themed to that map.
💎
Rupes Nigra Drops
All Fever monsters — normal and elite — have a chance to drop Rupes Nigra crafting materials. Deeper, harder maps have better odds for rarer tiers.
⚠️
GvG / WoE Restriction
Set bonuses and special effects are fully disabled on any map flagged as GvG, WoE, Castle, or Guild War. Equipment can still be worn, but the bonuses are suppressed.
Rupes Nigra Material Chain
🌿
Payon Forest
Forest Set
🏜️
Sograt Desert
Sand Set
🏚️
Glast Heim
Shadow Set
🌋
Magma Dungeon
Magma Set
🐉
Abyss Lake
Dragon & Bone Set
Payon Forest Fever Field


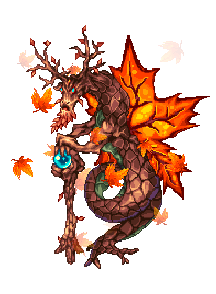
Forest Set
Forest Set Bonus
⬡ Full Set Effect (Armor + Shoes + Manteau)
- Max HP +10%
- Natural HP recovery +15%
- Damage dealt to Plant and Brute monsters +8%
- HP healing received +20%
⚠ Set bonuses are disabled on GvG / WoE flagged maps.
Forest Item Combo
Forest Fever MVP
Fever MVP Drop — Forest Armor / Shoes / Manteau with Special Options
- Damage against Plant race +8% ~ +14%
- Damage against Brute race +6% ~ +12%
- Healing received from all sources +6% ~ +10%
- Chance (5%) on kill: instantly recover 3% Max HP
- Earth element resistance +5% ~ +9%
Sograt Desert Fever Field


Sand Set
Sand Set Bonus
⬡ Full Set Effect (Armor + Shoes + Manteau)
- Max HP +8%
- Ranged damage received −5%
- Damage dealt to Fire element monsters +10%
- Resistance to status effects (Silence, Curse, Blind, Stun) +20%
⚠ Set bonuses are disabled on GvG / WoE flagged maps.
Desert Item Combo
Desert Fever MVP
Fever MVP Drop — Sand Armor / Shoes / Manteau with Special Options
- Damage against Demon race +8% ~ +14%
- Damage against Brute race +6% ~ +11%
- Ranged damage received −6% ~ −10% additional
- Chance (8%) when hit: gain +12 DEF for 5 seconds
- Fire element resistance +6% ~ +10% additional
Glast Heim Fever Dungeons

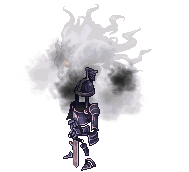
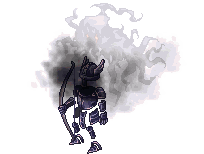
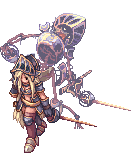

Shadow Set
Shadow Set Bonus
⬡ Full Set Effect (Armor + Shoes + Manteau)
- Damage received from Undead and Demon monsters −10%
- Shadow element resistance +10%
- SP recovery +20% inside Fever maps
- Curse status duration received −50%
⚠ Set bonuses are disabled on GvG / WoE flagged maps.
Glast Heim Item Combo
Glast Heim Fever MVP
Fever MVP Drop — Shadow Armor / Shoes / Manteau with Special Options
- Damage against Undead race +8% ~ +14%
- Damage against Demon race +7% ~ +13%
- Shadow element resistance +6% ~ +11% additional
- Holy element resistance +4% ~ +8%
- Chance (7%) when hit: reduce next instance of damage by 15% (2-second window)
- Chance (10%) on Undead kill: recover 4% Max SP
Magma Dungeon Level 3 Fever Area


Magma Set
Magma Set Bonus
⬡ Full Set Effect (Armor + Shoes + Manteau)
- ATK +20 and MATK +15
- Fire element resistance +10%
- ASPD +5%
- Damage against Fire-element and Formless monsters +8%
⚠ Set bonuses are disabled on GvG / WoE flagged maps.
Magma Item Combo
Magma Fever MVP
Fever MVP Drop — Magma Armor / Shoes / Manteau with Special Options
- Damage against Fire-element monsters +8% ~ +15%
- Damage against Formless race +7% ~ +13%
- Damage against Demon race +5% ~ +10%
- Fire element resistance +6% ~ +10% additional
- Chance (8%) on attack: trigger burning aura — ATK +18 for 5 seconds
- ATK % or MATK % against Fever monsters +5% ~ +9%
Abyss Lake Underground Cave Level 4


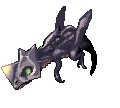
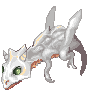


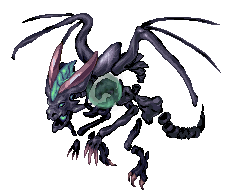
Dragon & Bone Set
Dragon & Bone Set Bonus
⬡ Full Set Effect (Armor + Shoes + Manteau)
- Dragon race damage received −15%
- Boss race damage received −5%
- Critical rate +8 and Critical damage +5%
- Dragon Slayer effect: 1% chance summons a Dragon Spirit — adds +15 ATK for 5 seconds
⚠ Set bonuses are disabled on GvG / WoE flagged maps.
Abyss Lake Item Combos
⚠ Abyss Lake is the only Fever map with two distinct item combos. Both can be active simultaneously if all items are equipped. They do not conflict.
Abyss Lake Fever MVP
Fever MVP Drop — Dragonbone Armor / Shoes / Manteau with Special Options
- Damage against Dragon race +10% ~ +16%
- Damage against Boss-type monsters +3% ~ +10%
- Critical damage +8% ~ +14% additional
- Dragon race damage received −6% ~ +11% additional
- Neutral element resistance +5% ~ +9% additional
- Chance (5%) on critical hit: Dragon Slayer effect activates — ATK +15 for 10 seconds
System Reference
Fever Maps at a Glance
Option Design Reference
⚠ Reminder: All Fever set bonuses and item combo effects are disabled on GvG, WoE, Castle, and Guild War flagged maps. Equipment may still be worn — only the Fever-specific bonuses are suppressed. Plan your gear loadout accordingly if you participate in competitive content.