Fever Fields: Difference between revisions
Jump to navigation
Jump to search
Tag: Undo |
No edit summary |
||
| Line 192: | Line 192: | ||
== Payon Forest Fever Field == | == Payon Forest Fever Field == | ||
<div style=" | <div style="background:linear-gradient(135deg,rgba(12,28,8,0.94),rgba(6,16,4,0.99));border:2px solid rgba(80,160,40,0.36);border-left:5px solid #66bb6a;border-radius:10px;padding:18px 22px 16px;margin:0 0 22px 0;position:relative;overflow:hidden;"> | ||
<div style="position:absolute;top:0;right:0;width:240px;height:100%;background:linear-gradient(270deg,rgba(102,187,106,0.10),transparent);pointer-events:none;"></div> | |||
<div style="position:absolute;bottom:-18px;right:24px;font-size:5em;opacity:0.045;pointer-events:none;line-height:1;">🌲</div> | |||
<div style="position:relative;z-index:1;color:#a5d6a7;font-size:0.90em;line-height:1.65;"> | |||
"> | |||
<div style="color:#a5d6a7; font-size:0.90em; line-height:1.65;"> | |||
Payon Forest has been corrupted by an ancient blight — Brute and Plant monsters have grown far stronger and more aggressive. The Forest Set focuses on <strong style="color:#c8e6c9;">natural vitality, high HP recovery, and elemental resistance</strong> against Poison and Earth damage. Hunters who master this field gain regenerative power unmatched in clean hunting grounds. | Payon Forest has been corrupted by an ancient blight — Brute and Plant monsters have grown far stronger and more aggressive. The Forest Set focuses on <strong style="color:#c8e6c9;">natural vitality, high HP recovery, and elemental resistance</strong> against Poison and Earth damage. Hunters who master this field gain regenerative power unmatched in clean hunting grounds. | ||
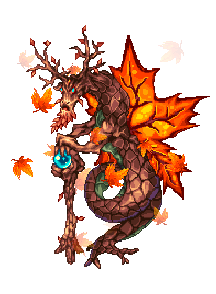
[[File:Pay_fild07_fever.png|250px]] | [[File:Pay_fild07_fever.png|250px]] | ||
</div> | |||
<div style="position:relative;z-index:1;margin-top:14px;background:rgba(6,20,4,0.64);border:1px solid rgba(100,180,80,0.18);border-radius:9px;padding:13px 15px;"> | |||
<div style="font-weight:bold;color:#a5d6a7;font-size:0.88em;letter-spacing:0.09em;text-transform:uppercase;margin-bottom:10px;">🌿 Monster Population — pay_fild07</div> | |||
<div style="display:grid;grid-template-columns:1fr 1fr;gap:10px;"> | |||
<div style="background:rgba(6,20,4,0.84);border:1px solid rgba(100,180,80,0.22);border-radius:9px;padding:11px 13px;position:relative;overflow:hidden;"> | |||
<div style="position:absolute;bottom:0;right:0;width:70px;height:70px;background:radial-gradient(circle,rgba(100,180,80,0.22),transparent 70%);opacity:0.60;pointer-events:none;"></div> | |||
<div style="position:relative;z-index:1;">{{Monster|id=3013|name=Pestilent Spore}}</div> | |||
<div style="position:relative;z-index:1;color:#a5d6a7;font-size:0.84em;margin-top:7px;font-weight:bold;"><span style="font-family:'Courier New',monospace;color:#90a4ae;font-size:0.78em;text-transform:uppercase;letter-spacing:0.08em;">Spawn</span> 90 monsters</div> | |||
<div style="position:relative;z-index:1;color:#78909c;font-size:0.78em;margin-top:4px;line-height:1.45;">Common entry monster for early Fever progression.</div> | |||
</div> | |||
<div style="background:rgba(6,20,4,0.84);border:1px solid rgba(100,180,80,0.22);border-radius:9px;padding:11px 13px;position:relative;overflow:hidden;"> | |||
<div style="position:absolute;bottom:0;right:0;width:70px;height:70px;background:radial-gradient(circle,rgba(100,180,80,0.22),transparent 70%);opacity:0.60;pointer-events:none;"></div> | |||
<div style="position:relative;z-index:1;">{{Monster|id=3014|name=Contaminated Rat}}</div> | |||
<div style="position:relative;z-index:1;color:#a5d6a7;font-size:0.84em;margin-top:7px;font-weight:bold;"><span style="font-family:'Courier New',monospace;color:#90a4ae;font-size:0.78em;text-transform:uppercase;letter-spacing:0.08em;">Spawn</span> 55 monsters</div> | |||
<div style="position:relative;z-index:1;color:#78909c;font-size:0.78em;margin-top:4px;line-height:1.45;">Aggressive low-level threat with pressure on fragile characters.</div> | |||
</div> | |||
<div style="background:rgba(6,20,4,0.84);border:1px solid rgba(100,180,80,0.22);border-radius:9px;padding:11px 13px;position:relative;overflow:hidden;"> | |||
<div style="position:absolute;bottom:0;right:0;width:70px;height:70px;background:radial-gradient(circle,rgba(100,180,80,0.22),transparent 70%);opacity:0.60;pointer-events:none;"></div> | |||
<div style="position:relative;z-index:1;">{{Monster|id=3015|name=Plague Worm}}</div> | |||
<div style="position:relative;z-index:1;color:#a5d6a7;font-size:0.84em;margin-top:7px;font-weight:bold;"><span style="font-family:'Courier New',monospace;color:#90a4ae;font-size:0.78em;text-transform:uppercase;letter-spacing:0.08em;">Spawn</span> 40 monsters</div> | |||
<div style="position:relative;z-index:1;color:#78909c;font-size:0.78em;margin-top:4px;line-height:1.45;">Main leveling target of the Payon Forest Fever Field.</div> | |||
</div> | |||
<div style="background:rgba(24,18,4,0.86);border:1px solid rgba(255,160,64,0.24);border-radius:9px;padding:11px 13px;position:relative;overflow:hidden;"> | |||
<div style="position:absolute;bottom:0;right:0;width:70px;height:70px;background:radial-gradient(circle,rgba(255,160,64,0.24),transparent 70%);opacity:0.60;pointer-events:none;"></div> | |||
<div style="position:relative;z-index:1;">{{Monster|id=3057|name=Firebug}}</div> | |||
<div style="position:relative;z-index:1;color:#ffcc80;font-size:0.84em;margin-top:7px;font-weight:bold;"><span style="font-family:'Courier New',monospace;color:#90a4ae;font-size:0.78em;text-transform:uppercase;letter-spacing:0.08em;">Spawn</span> 30 monsters</div> | |||
<div style="position:relative;z-index:1;color:#78909c;font-size:0.78em;margin-top:4px;line-height:1.45;">Elite spawn; much stronger than the regular forest population.</div> | |||
</div> | |||
</div> | |||
<div style="background:linear-gradient(135deg,rgba(32,18,4,0.94),rgba(8,6,4,0.99));border:1px solid rgba(255,193,7,0.30);border-left:4px solid #ffc107;border-radius:9px;padding:12px 14px;position:relative;overflow:hidden;margin-top:12px;"> | |||
<div style="position:absolute;top:0;right:0;width:160px;height:100%;background:linear-gradient(270deg,rgba(255,193,7,0.30),transparent);opacity:0.55;pointer-events:none;"></div> | |||
<div style="position:relative;z-index:1;display:grid;grid-template-columns:1fr auto;gap:12px;align-items:center;"> | |||
<div> | |||
<div style="font-weight:bold;color:#ffc107;font-size:0.82em;letter-spacing:0.10em;text-transform:uppercase;margin-bottom:6px;">👑 Fever MVP</div> | |||
<div>{{Monster|id=3059|name=Sensho World Sage}}</div> | |||
</div> | |||
<div style="text-align:right;color:#d7c8a0;font-size:0.82em;line-height:1.55;"> | |||
<div><strong style="color:#ffc107;">Spawn:</strong> 1 monster</div> | |||
<div><strong style="color:#ffc107;">Respawn:</strong> 3 hours</div> | |||
</div> | |||
</div> | |||
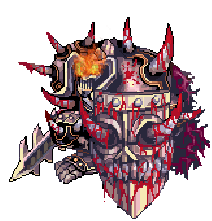
<div style="position:relative;z-index:1;color:#9a9088;font-size:0.80em;line-height:1.55;margin-top:8px;">Scheduled boss objective and peak threat of Payon Forest Fever.</div> | |||
</div> | |||
<div style="margin-top:12px;padding:10px 12px;background:rgba(0,0,0,0.22);border:1px solid rgba(255,255,255,0.08);border-radius:7px;color:#78909c;font-size:0.82em;line-height:1.60;"> | |||
<strong style="color:#a5d6a7;">Total Population:</strong> 215 regular monsters + 1 MVP. This entry Fever field is built around Poison-aligned hunting, sustain, and early equipment progression. | |||
</div> | |||
</div> | </div> | ||
</div> | </div> | ||
=== Forest Set === | === Forest Set === | ||
| Line 333: | Line 372: | ||
== Sograt Desert Fever Field == | == Sograt Desert Fever Field == | ||
<div style=" | <div style="background:linear-gradient(135deg,rgba(36,28,6,0.94),rgba(18,12,2,0.99));border:2px solid rgba(220,180,40,0.34);border-left:5px solid #ffd54f;border-radius:10px;padding:18px 22px 16px;margin:0 0 22px 0;position:relative;overflow:hidden;"> | ||
<div style="position:absolute;top:0;right:0;width:240px;height:100%;background:linear-gradient(270deg,rgba(255,213,79,0.10),transparent);pointer-events:none;"></div> | |||
<div style="position:absolute;bottom:-18px;right:24px;font-size:5em;opacity:0.045;pointer-events:none;line-height:1;">🏜️</div> | |||
<div style="position:relative;z-index:1;color:#fff9c4;font-size:0.90em;line-height:1.65;"> | |||
"> | |||
<div style="color:#fff9c4; font-size:0.90em; line-height:1.65;"> | |||
The Sograt Desert Fever Field is a merciless expanse of scorched dunes. Demon and Brute-type monsters have been mutated by the desert heat and roam in ferocious packs. The Sand Set is built around <strong style="color:#fff59d;">endurance, defensive layers, and resistance to Fire and ranged attacks</strong>, rewarding players who can outlast and outlevel the desert's punishment. | The Sograt Desert Fever Field is a merciless expanse of scorched dunes. Demon and Brute-type monsters have been mutated by the desert heat and roam in ferocious packs. The Sand Set is built around <strong style="color:#fff59d;">endurance, defensive layers, and resistance to Fire and ranged attacks</strong>, rewarding players who can outlast and outlevel the desert's punishment. | ||
</div> | |||
<div style="position:relative;z-index:1;margin-top:14px;background:rgba(24,18,4,0.64);border:1px solid rgba(220,180,40,0.18);border-radius:9px;padding:13px 15px;"> | |||
<div style="font-weight:bold;color:#fff176;font-size:0.88em;letter-spacing:0.09em;text-transform:uppercase;margin-bottom:10px;">🏜️ Monster Population — moc_fild17</div> | |||
<div style="display:grid;grid-template-columns:1fr 1fr;gap:10px;"> | |||
<div style="background:rgba(24,18,4,0.84);border:1px solid rgba(220,180,40,0.22);border-radius:9px;padding:11px 13px;position:relative;overflow:hidden;"> | |||
<div style="position:absolute;bottom:0;right:0;width:70px;height:70px;background:radial-gradient(circle,rgba(220,180,40,0.22),transparent 70%);opacity:0.60;pointer-events:none;"></div> | |||
<div style="position:relative;z-index:1;">{{Monster|id=3018|name=Elite Ant}}</div> | |||
<div style="position:relative;z-index:1;color:#fff9c4;font-size:0.84em;margin-top:7px;font-weight:bold;"><span style="font-family:'Courier New',monospace;color:#90a4ae;font-size:0.78em;text-transform:uppercase;letter-spacing:0.08em;">Spawn</span> 70 monsters</div> | |||
<div style="position:relative;z-index:1;color:#78909c;font-size:0.78em;margin-top:4px;line-height:1.45;">Main swarm unit and primary desert hunting target.</div> | |||
</div> | |||
<div style="background:rgba(24,18,4,0.84);border:1px solid rgba(220,180,40,0.22);border-radius:9px;padding:11px 13px;position:relative;overflow:hidden;"> | |||
<div style="position:absolute;bottom:0;right:0;width:70px;height:70px;background:radial-gradient(circle,rgba(220,180,40,0.22),transparent 70%);opacity:0.60;pointer-events:none;"></div> | |||
<div style="position:relative;z-index:1;">{{Monster|id=3021|name=Elite Ant Larva}}</div> | |||
<div style="position:relative;z-index:1;color:#fff9c4;font-size:0.84em;margin-top:7px;font-weight:bold;"><span style="font-family:'Courier New',monospace;color:#90a4ae;font-size:0.78em;text-transform:uppercase;letter-spacing:0.08em;">Spawn</span> 30 monsters</div> | |||
<div style="position:relative;z-index:1;color:#78909c;font-size:0.78em;margin-top:4px;line-height:1.45;">Support swarm monster that fills the ant colony population.</div> | |||
</div> | |||
<div style="background:rgba(36,14,4,0.86);border:1px solid rgba(255,120,40,0.24);border-radius:9px;padding:11px 13px;position:relative;overflow:hidden;"> | |||
<div style="position:absolute;bottom:0;right:0;width:70px;height:70px;background:radial-gradient(circle,rgba(255,120,40,0.24),transparent 70%);opacity:0.60;pointer-events:none;"></div> | |||
<div style="position:relative;z-index:1;">{{Monster|id=3000|name=Inferno Scorpion}}</div> | |||
<div style="position:relative;z-index:1;color:#ffcc80;font-size:0.84em;margin-top:7px;font-weight:bold;"><span style="font-family:'Courier New',monospace;color:#90a4ae;font-size:0.78em;text-transform:uppercase;letter-spacing:0.08em;">Spawn</span> 70 monsters</div> | |||
<div style="position:relative;z-index:1;color:#78909c;font-size:0.78em;margin-top:4px;line-height:1.45;">Fire-themed desert threat and second major hunting target.</div> | |||
</div> | |||
<div style="background:rgba(24,18,4,0.84);border:1px solid rgba(220,180,40,0.22);border-radius:9px;padding:11px 13px;position:relative;overflow:hidden;"> | |||
<div style="position:absolute;bottom:0;right:0;width:70px;height:70px;background:radial-gradient(circle,rgba(220,180,40,0.22),transparent 70%);opacity:0.60;pointer-events:none;"></div> | |||
<div style="position:relative;z-index:1;">{{Monster|id=3001|name=Desert Mosquito}}</div> | |||
<div style="position:relative;z-index:1;color:#fff9c4;font-size:0.84em;margin-top:7px;font-weight:bold;"><span style="font-family:'Courier New',monospace;color:#90a4ae;font-size:0.78em;text-transform:uppercase;letter-spacing:0.08em;">Spawn</span> 15 monsters</div> | |||
<div style="position:relative;z-index:1;color:#78909c;font-size:0.78em;margin-top:4px;line-height:1.45;">Fast nuisance monster that adds movement pressure.</div> | |||
</div> | |||
<div style="background:rgba(24,18,4,0.84);border:1px solid rgba(220,180,40,0.22);border-radius:9px;padding:11px 13px;position:relative;overflow:hidden;"> | |||
<div style="position:absolute;bottom:0;right:0;width:70px;height:70px;background:radial-gradient(circle,rgba(220,180,40,0.22),transparent 70%);opacity:0.60;pointer-events:none;"></div> | |||
<div style="position:relative;z-index:1;">{{Monster|id=3002|name=Sand Lurker}}</div> | |||
<div style="position:relative;z-index:1;color:#fff9c4;font-size:0.84em;margin-top:7px;font-weight:bold;"><span style="font-family:'Courier New',monospace;color:#90a4ae;font-size:0.78em;text-transform:uppercase;letter-spacing:0.08em;">Spawn</span> 25 monsters</div> | |||
<div style="position:relative;z-index:1;color:#78909c;font-size:0.78em;margin-top:4px;line-height:1.45;">Ambush-style monster supporting the desert terrain identity.</div> | |||
</div> | |||
<div style="background:rgba(24,18,4,0.84);border:1px solid rgba(220,180,40,0.22);border-radius:9px;padding:11px 13px;position:relative;overflow:hidden;"> | |||
<div style="position:absolute;bottom:0;right:0;width:70px;height:70px;background:radial-gradient(circle,rgba(220,180,40,0.22),transparent 70%);opacity:0.60;pointer-events:none;"></div> | |||
<div style="position:relative;z-index:1;">{{Monster|id=3017|name=Elite Ant Egg}}</div> | |||
<div style="position:relative;z-index:1;color:#fff9c4;font-size:0.84em;margin-top:7px;font-weight:bold;"><span style="font-family:'Courier New',monospace;color:#90a4ae;font-size:0.78em;text-transform:uppercase;letter-spacing:0.08em;">Spawn</span> 10 monsters</div> | |||
<div style="position:relative;z-index:1;color:#78909c;font-size:0.78em;margin-top:4px;line-height:1.45;">Stationary colony spawn and utility monster.</div> | |||
</div> | |||
<div style="background:rgba(24,24,8,0.84);border:1px solid rgba(180,220,80,0.22);border-radius:9px;padding:11px 13px;position:relative;overflow:hidden;"> | |||
<div style="position:absolute;bottom:0;right:0;width:70px;height:70px;background:radial-gradient(circle,rgba(180,220,80,0.22),transparent 70%);opacity:0.60;pointer-events:none;"></div> | |||
<div style="position:relative;z-index:1;">{{Monster|id=3055|name=Living Soil}}</div> | |||
<div style="position:relative;z-index:1;color:#e6ee9c;font-size:0.84em;margin-top:7px;font-weight:bold;"><span style="font-family:'Courier New',monospace;color:#90a4ae;font-size:0.78em;text-transform:uppercase;letter-spacing:0.08em;">Spawn</span> 10 monsters</div> | |||
<div style="position:relative;z-index:1;color:#78909c;font-size:0.78em;margin-top:4px;line-height:1.45;">Earth-themed support monster reinforcing the desert field identity.</div> | |||
</div> | |||
</div> | |||
<div style="margin-top:12px;padding:10px 12px;background:rgba(0,0,0,0.22);border:1px solid rgba(255,255,255,0.08);border-radius:7px;color:#78909c;font-size:0.82em;line-height:1.60;"> | |||
<strong style="color:#fff176;">Total Population:</strong> 230 regular monsters. A dense mid-level Fever zone focused on insects, Fire pressure, Earth terrain, and swarm hunting. | |||
</div> | |||
</div> | </div> | ||
</div> | </div> | ||
| Line 470: | Line 555: | ||
== Glast Heim Fever Dungeons == | == Glast Heim Fever Dungeons == | ||
<div style=" | <div style="background:linear-gradient(135deg,rgba(22,10,34,0.94),rgba(10,4,18,0.99));border:2px solid rgba(150,80,220,0.34);border-left:5px solid #ce93d8;border-radius:10px;padding:18px 22px 16px;margin:0 0 22px 0;position:relative;overflow:hidden;"> | ||
<div style="position:absolute;top:0;right:0;width:240px;height:100%;background:linear-gradient(270deg,rgba(206,147,216,0.10),transparent);pointer-events:none;"></div> | |||
<div style="position:absolute;bottom:-18px;right:24px;font-size:5em;opacity:0.045;pointer-events:none;line-height:1;">🏚️</div> | |||
<div style="position:relative;z-index:1;color:#e1bee7;font-size:0.90em;line-height:1.65;"> | |||
"> | |||
<div style="color:#e1bee7; font-size:0.90em; line-height:1.65;"> | |||
The ruins of Glast Heim have collapsed inward, trapping wandering Undead and Demon entities within sealed catacombs. The Fever variants are driven by cursed dark energy — applying <strong style="color:#ce93d8;">Shadow element damage, Curse status chains, and massive SP drain</strong>. The Shadow Set is built for Undead and Demon hunting specialists — maximizing SP efficiency and Shadow element resilience. | The ruins of Glast Heim have collapsed inward, trapping wandering Undead and Demon entities within sealed catacombs. The Fever variants are driven by cursed dark energy — applying <strong style="color:#ce93d8;">Shadow element damage, Curse status chains, and massive SP drain</strong>. The Shadow Set is built for Undead and Demon hunting specialists — maximizing SP efficiency and Shadow element resilience. | ||
</div> | |||
<div style="position:relative;z-index:1;margin-top:14px;background:rgba(18,8,30,0.64);border:1px solid rgba(150,80,220,0.18);border-radius:9px;padding:13px 15px;"> | |||
<div style="font-weight:bold;color:#e1bee7;font-size:0.88em;letter-spacing:0.09em;text-transform:uppercase;margin-bottom:10px;">🏚️ Monster Population — gl_knt02</div> | |||
<div style="display:grid;grid-template-columns:1fr 1fr;gap:10px;"> | |||
<div style="background:rgba(18,8,30,0.84);border:1px solid rgba(150,80,220,0.22);border-radius:9px;padding:11px 13px;position:relative;overflow:hidden;"> | |||
<div style="position:absolute;bottom:0;right:0;width:70px;height:70px;background:radial-gradient(circle,rgba(150,80,220,0.22),transparent 70%);opacity:0.60;pointer-events:none;"></div> | |||
<div style="position:relative;z-index:1;">{{Monster|id=3069|name=Corrupted Raydric}}</div> | |||
<div style="position:relative;z-index:1;color:#e1bee7;font-size:0.84em;margin-top:7px;font-weight:bold;"><span style="font-family:'Courier New',monospace;color:#90a4ae;font-size:0.78em;text-transform:uppercase;letter-spacing:0.08em;">Spawn</span> 80 monsters</div> | |||
<div style="position:relative;z-index:1;color:#78909c;font-size:0.78em;margin-top:4px;line-height:1.45;">Main Shadow field monster and core hunting target.</div> | |||
</div> | |||
<div style="background:rgba(18,8,30,0.84);border:1px solid rgba(150,80,220,0.22);border-radius:9px;padding:11px 13px;position:relative;overflow:hidden;"> | |||
<div style="position:absolute;bottom:0;right:0;width:70px;height:70px;background:radial-gradient(circle,rgba(150,80,220,0.22),transparent 70%);opacity:0.60;pointer-events:none;"></div> | |||
<div style="position:relative;z-index:1;">{{Monster|id=3070|name=Corrupted Archer}}</div> | |||
<div style="position:relative;z-index:1;color:#e1bee7;font-size:0.84em;margin-top:7px;font-weight:bold;"><span style="font-family:'Courier New',monospace;color:#90a4ae;font-size:0.78em;text-transform:uppercase;letter-spacing:0.08em;">Spawn</span> 40 monsters</div> | |||
<div style="position:relative;z-index:1;color:#78909c;font-size:0.78em;margin-top:4px;line-height:1.45;">Ranged pressure monster that punishes careless pulls.</div> | |||
</div> | |||
<div style="background:rgba(18,8,30,0.84);border:1px solid rgba(150,80,220,0.22);border-radius:9px;padding:11px 13px;position:relative;overflow:hidden;"> | |||
<div style="position:absolute;bottom:0;right:0;width:70px;height:70px;background:radial-gradient(circle,rgba(150,80,220,0.22),transparent 70%);opacity:0.60;pointer-events:none;"></div> | |||
<div style="position:relative;z-index:1;">{{Monster|id=3071|name=Corrupted Khalitzburg}}</div> | |||
<div style="position:relative;z-index:1;color:#e1bee7;font-size:0.84em;margin-top:7px;font-weight:bold;"><span style="font-family:'Courier New',monospace;color:#90a4ae;font-size:0.78em;text-transform:uppercase;letter-spacing:0.08em;">Spawn</span> 30 regular + 10 fixed spawns</div> | |||
<div style="position:relative;z-index:1;color:#78909c;font-size:0.78em;margin-top:4px;line-height:1.45;">Fixed spawns respawn every 30 minutes + 15 minutes variance.</div> | |||
</div> | |||
<div style="background:rgba(18,8,30,0.84);border:1px solid rgba(150,80,220,0.22);border-radius:9px;padding:11px 13px;position:relative;overflow:hidden;"> | |||
<div style="position:absolute;bottom:0;right:0;width:70px;height:70px;background:radial-gradient(circle,rgba(150,80,220,0.22),transparent 70%);opacity:0.60;pointer-events:none;"></div> | |||
<div style="position:relative;z-index:1;">{{Monster|id=3073|name=Undead Wizard}}</div> | |||
<div style="position:relative;z-index:1;color:#e1bee7;font-size:0.84em;margin-top:7px;font-weight:bold;"><span style="font-family:'Courier New',monospace;color:#90a4ae;font-size:0.78em;text-transform:uppercase;letter-spacing:0.08em;">Spawn</span> 20 monsters</div> | |||
<div style="position:relative;z-index:1;color:#78909c;font-size:0.78em;margin-top:4px;line-height:1.45;">Magic threat with Shadow-themed pressure.</div> | |||
</div> | |||
<div style="background:rgba(18,8,30,0.84);border:1px solid rgba(150,80,220,0.22);border-radius:9px;padding:11px 13px;position:relative;overflow:hidden;"> | |||
<div style="position:absolute;bottom:0;right:0;width:70px;height:70px;background:radial-gradient(circle,rgba(150,80,220,0.22),transparent 70%);opacity:0.60;pointer-events:none;"></div> | |||
<div style="position:relative;z-index:1;">{{Monster|id=3072|name=Corrupted Whiteknight}}</div> | |||
<div style="position:relative;z-index:1;color:#e1bee7;font-size:0.84em;margin-top:7px;font-weight:bold;"><span style="font-family:'Courier New',monospace;color:#90a4ae;font-size:0.78em;text-transform:uppercase;letter-spacing:0.08em;">Spawn</span> 5 regular + 1 fixed spawn</div> | |||
<div style="position:relative;z-index:1;color:#78909c;font-size:0.78em;margin-top:4px;line-height:1.45;">Fixed spawn respawns every 1 hour + 30 minutes variance.</div> | |||
</div> | |||
</div> | |||
<div style="background:linear-gradient(135deg,rgba(38,8,8,0.94),rgba(8,6,4,0.99));border:1px solid rgba(220,60,80,0.32);border-left:4px solid #e57373;border-radius:9px;padding:12px 14px;position:relative;overflow:hidden;margin-top:12px;"> | |||
<div style="position:absolute;top:0;right:0;width:160px;height:100%;background:linear-gradient(270deg,rgba(220,60,80,0.32),transparent);opacity:0.55;pointer-events:none;"></div> | |||
<div style="position:relative;z-index:1;display:grid;grid-template-columns:1fr auto;gap:12px;align-items:center;"> | |||
<div> | |||
<div style="font-weight:bold;color:#e57373;font-size:0.82em;letter-spacing:0.10em;text-transform:uppercase;margin-bottom:6px;">👑 Fever MVP</div> | |||
<div>{{Monster|id=3074|name=Bloody Knight}}</div> | |||
</div> | |||
<div style="text-align:right;color:#d7c8a0;font-size:0.82em;line-height:1.55;"> | |||
<div><strong style="color:#e57373;">Spawn:</strong> 1 monster</div> | |||
<div><strong style="color:#e57373;">Respawn:</strong> 2 hours + 30 minutes variance</div> | |||
</div> | |||
</div> | |||
<div style="position:relative;z-index:1;color:#9a9088;font-size:0.80em;line-height:1.55;margin-top:8px;">High-level Fever MVP and scheduled Glast Heim objective.</div> | |||
</div> | |||
<div style="margin-top:12px;padding:10px 12px;background:rgba(0,0,0,0.22);border:1px solid rgba(255,255,255,0.08);border-radius:7px;color:#78909c;font-size:0.82em;line-height:1.60;"> | |||
<strong style="color:#e1bee7;">Total Population:</strong> 186 regular monsters + 1 MVP. A high-level Fever dungeon with Undead pressure, ranged threats, fixed elite spawns, and scheduled boss hunting. | |||
</div> | |||
</div> | </div> | ||
</div> | </div> | ||
| Line 607: | Line 740: | ||
== Magma Dungeon Level 3 Fever Area == | == Magma Dungeon Level 3 Fever Area == | ||
<div style=" | <div style="background:linear-gradient(135deg,rgba(38,10,4,0.94),rgba(18,4,2,0.99));border:2px solid rgba(240,90,40,0.36);border-left:5px solid #f4511e;border-radius:10px;padding:18px 22px 16px;margin:0 0 22px 0;position:relative;overflow:hidden;"> | ||
<div style="position:absolute;top:0;right:0;width:240px;height:100%;background:linear-gradient(270deg,rgba(244,81,30,0.11),transparent);pointer-events:none;"></div> | |||
<div style="position:absolute;bottom:-18px;right:24px;font-size:5em;opacity:0.045;pointer-events:none;line-height:1;">🌋</div> | |||
<div style="position:relative;z-index:1;color:#ffccbc;font-size:0.90em;line-height:1.65;"> | |||
"> | |||
<div style="color:#ffccbc; font-size:0.90em; line-height:1.65;"> | |||
The deepest floors of Magma Dungeon have cracked open, and superheated Fire element creatures have flooded the tunnels. The Magma Set is the most <strong style="color:#ff8a65;">offensively-oriented Fever set</strong> — boosting ATK, MATK, Fire resistance, and ASPD for aggressive, sustained pressure in a kill-or-be-killed environment. | The deepest floors of Magma Dungeon have cracked open, and superheated Fire element creatures have flooded the tunnels. The Magma Set is the most <strong style="color:#ff8a65;">offensively-oriented Fever set</strong> — boosting ATK, MATK, Fire resistance, and ASPD for aggressive, sustained pressure in a kill-or-be-killed environment. | ||
</div> | |||
<div style="position:relative;z-index:1;margin-top:14px;background:rgba(32,8,4,0.64);border:1px solid rgba(240,90,40,0.18);border-radius:9px;padding:13px 15px;"> | |||
<div style="font-weight:bold;color:#ffab91;font-size:0.88em;letter-spacing:0.09em;text-transform:uppercase;margin-bottom:10px;">🌋 Monster Population — mag_dun03</div> | |||
<div style="display:grid;grid-template-columns:1fr 1fr;gap:10px;"> | |||
<div style="background:rgba(32,8,4,0.84);border:1px solid rgba(240,90,40,0.22);border-radius:9px;padding:11px 13px;position:relative;overflow:hidden;"> | |||
<div style="position:absolute;bottom:0;right:0;width:70px;height:70px;background:radial-gradient(circle,rgba(240,90,40,0.22),transparent 70%);opacity:0.60;pointer-events:none;"></div> | |||
<div style="position:relative;z-index:1;">{{Monster|id=20378|name=Rigid Lava Golem}}</div> | |||
<div style="position:relative;z-index:1;color:#ffccbc;font-size:0.84em;margin-top:7px;font-weight:bold;"><span style="font-family:'Courier New',monospace;color:#90a4ae;font-size:0.78em;text-transform:uppercase;letter-spacing:0.08em;">Spawn</span> 18 monsters</div> | |||
<div style="position:relative;z-index:1;color:#78909c;font-size:0.78em;margin-top:4px;line-height:1.45;">Durable Fire-heavy front-line monster.</div> | |||
</div> | |||
<div style="background:rgba(32,8,4,0.84);border:1px solid rgba(240,90,40,0.22);border-radius:9px;padding:11px 13px;position:relative;overflow:hidden;"> | |||
<div style="position:absolute;bottom:0;right:0;width:70px;height:70px;background:radial-gradient(circle,rgba(240,90,40,0.22),transparent 70%);opacity:0.60;pointer-events:none;"></div> | |||
<div style="position:relative;z-index:1;">{{Monster|id=20377|name=Rigid Kaho}}</div> | |||
<div style="position:relative;z-index:1;color:#ffccbc;font-size:0.84em;margin-top:7px;font-weight:bold;"><span style="font-family:'Courier New',monospace;color:#90a4ae;font-size:0.78em;text-transform:uppercase;letter-spacing:0.08em;">Spawn</span> 20 monsters</div> | |||
<div style="position:relative;z-index:1;color:#78909c;font-size:0.78em;margin-top:4px;line-height:1.45;">Fire caster pressure unit.</div> | |||
</div> | |||
<div style="background:rgba(32,8,4,0.84);border:1px solid rgba(240,90,40,0.22);border-radius:9px;padding:11px 13px;position:relative;overflow:hidden;"> | |||
<div style="position:absolute;bottom:0;right:0;width:70px;height:70px;background:radial-gradient(circle,rgba(240,90,40,0.22),transparent 70%);opacity:0.60;pointer-events:none;"></div> | |||
<div style="position:relative;z-index:1;">{{Monster|id=20376|name=Rigid Explosion}}</div> | |||
<div style="position:relative;z-index:1;color:#ffccbc;font-size:0.84em;margin-top:7px;font-weight:bold;"><span style="font-family:'Courier New',monospace;color:#90a4ae;font-size:0.78em;text-transform:uppercase;letter-spacing:0.08em;">Spawn</span> 20 monsters</div> | |||
<div style="position:relative;z-index:1;color:#78909c;font-size:0.78em;margin-top:4px;line-height:1.45;">Volatile monster for burst-pressure pulls.</div> | |||
</div> | |||
<div style="background:rgba(32,8,4,0.84);border:1px solid rgba(240,90,40,0.22);border-radius:9px;padding:11px 13px;position:relative;overflow:hidden;"> | |||
<div style="position:absolute;bottom:0;right:0;width:70px;height:70px;background:radial-gradient(circle,rgba(240,90,40,0.22),transparent 70%);opacity:0.60;pointer-events:none;"></div> | |||
<div style="position:relative;z-index:1;">{{Monster|id=20374|name=Rigid Sky Deleter}}</div> | |||
<div style="position:relative;z-index:1;color:#ffccbc;font-size:0.84em;margin-top:7px;font-weight:bold;"><span style="font-family:'Courier New',monospace;color:#90a4ae;font-size:0.78em;text-transform:uppercase;letter-spacing:0.08em;">Spawn</span> 32 monsters</div> | |||
<div style="position:relative;z-index:1;color:#78909c;font-size:0.78em;margin-top:4px;line-height:1.45;">High-density flying dragon threat.</div> | |||
</div> | |||
<div style="background:rgba(32,8,4,0.84);border:1px solid rgba(240,90,40,0.22);border-radius:9px;padding:11px 13px;position:relative;overflow:hidden;"> | |||
<div style="position:absolute;bottom:0;right:0;width:70px;height:70px;background:radial-gradient(circle,rgba(240,90,40,0.22),transparent 70%);opacity:0.60;pointer-events:none;"></div> | |||
<div style="position:relative;z-index:1;">{{Monster|id=20375|name=Rigid Earth Deleter}}</div> | |||
<div style="position:relative;z-index:1;color:#ffccbc;font-size:0.84em;margin-top:7px;font-weight:bold;"><span style="font-family:'Courier New',monospace;color:#90a4ae;font-size:0.78em;text-transform:uppercase;letter-spacing:0.08em;">Spawn</span> 32 monsters</div> | |||
<div style="position:relative;z-index:1;color:#78909c;font-size:0.78em;margin-top:4px;line-height:1.45;">High-density grounded dragon threat.</div> | |||
</div> | |||
<div style="background:rgba(32,8,4,0.84);border:1px solid rgba(240,90,40,0.22);border-radius:9px;padding:11px 13px;position:relative;overflow:hidden;"> | |||
<div style="position:absolute;bottom:0;right:0;width:70px;height:70px;background:radial-gradient(circle,rgba(240,90,40,0.22),transparent 70%);opacity:0.60;pointer-events:none;"></div> | |||
<div style="position:relative;z-index:1;">{{Monster|id=20373|name=Rigid Nightmare Terror}}</div> | |||
<div style="position:relative;z-index:1;color:#ffccbc;font-size:0.84em;margin-top:7px;font-weight:bold;"><span style="font-family:'Courier New',monospace;color:#90a4ae;font-size:0.78em;text-transform:uppercase;letter-spacing:0.08em;">Spawn</span> 27 monsters</div> | |||
<div style="position:relative;z-index:1;color:#78909c;font-size:0.78em;margin-top:4px;line-height:1.45;">Dangerous sustained combat monster.</div> | |||
</div> | |||
<div style="background:rgba(32,8,4,0.84);border:1px solid rgba(240,90,40,0.22);border-radius:9px;padding:11px 13px;position:relative;overflow:hidden;"> | |||
<div style="position:absolute;bottom:0;right:0;width:70px;height:70px;background:radial-gradient(circle,rgba(240,90,40,0.22),transparent 70%);opacity:0.60;pointer-events:none;"></div> | |||
<div style="position:relative;z-index:1;">{{Monster|id=20372|name=Rigid Blazer}}</div> | |||
<div style="position:relative;z-index:1;color:#ffccbc;font-size:0.84em;margin-top:7px;font-weight:bold;"><span style="font-family:'Courier New',monospace;color:#90a4ae;font-size:0.78em;text-transform:uppercase;letter-spacing:0.08em;">Spawn</span> 18 monsters</div> | |||
<div style="position:relative;z-index:1;color:#78909c;font-size:0.78em;margin-top:4px;line-height:1.45;">Fire support monster reinforcing Magma pressure.</div> | |||
</div> | |||
</div> | |||
<div style="background:linear-gradient(135deg,rgba(44,12,4,0.96),rgba(8,6,4,0.99));border:1px solid rgba(255,160,64,0.34);border-left:4px solid #ff9800;border-radius:9px;padding:12px 14px;position:relative;overflow:hidden;margin-top:12px;"> | |||
<div style="position:absolute;top:0;right:0;width:160px;height:100%;background:linear-gradient(270deg,rgba(255,160,64,0.34),transparent);opacity:0.55;pointer-events:none;"></div> | |||
<div style="position:relative;z-index:1;display:grid;grid-template-columns:1fr auto;gap:12px;align-items:center;"> | |||
<div> | |||
<div style="font-weight:bold;color:#ff9800;font-size:0.82em;letter-spacing:0.10em;text-transform:uppercase;margin-bottom:6px;">👑 Fever MVP</div> | |||
<div>{{Monster|id=3012|name=Searing Monarch}}</div> | |||
</div> | |||
<div style="text-align:right;color:#d7c8a0;font-size:0.82em;line-height:1.55;"> | |||
<div><strong style="color:#ff9800;">Spawn:</strong> 1 monster</div> | |||
<div><strong style="color:#ff9800;">Respawn:</strong> 6 hours + 10 minutes variance</div> | |||
</div> | |||
</div> | |||
<div style="position:relative;z-index:1;color:#9a9088;font-size:0.80em;line-height:1.55;margin-top:8px;">Magma Fever MVP and long-window boss objective.</div> | |||
</div> | |||
<div style="margin-top:12px;padding:10px 12px;background:rgba(0,0,0,0.22);border:1px solid rgba(255,255,255,0.08);border-radius:7px;color:#78909c;font-size:0.82em;line-height:1.60;"> | |||
<strong style="color:#ffab91;">Total Population:</strong> 167 regular monsters + 1 MVP. A Fire-heavy Fever dungeon designed around high pressure, elemental resistance, and sustained party hunting. | |||
</div> | |||
</div> | </div> | ||
</div> | </div> | ||
| Line 744: | Line 937: | ||
== Abyss Lake Underground Cave Level 4 == | == Abyss Lake Underground Cave Level 4 == | ||
<div style=" | <div style="background:linear-gradient(135deg,rgba(8,18,42,0.94),rgba(4,8,24,0.99));border:2px solid rgba(60,150,240,0.34);border-left:5px solid #64b5f6;border-radius:10px;padding:18px 22px 16px;margin:0 0 22px 0;position:relative;overflow:hidden;"> | ||
<div style="position:absolute;top:0;right:0;width:240px;height:100%;background:linear-gradient(270deg,rgba(100,181,246,0.11),transparent);pointer-events:none;"></div> | |||
<div style="position:absolute;bottom:-18px;right:24px;font-size:5em;opacity:0.045;pointer-events:none;line-height:1;">🐉</div> | |||
<div style="position:relative;z-index:1;color:#b3d4f8;font-size:0.90em;line-height:1.65;"> | |||
"> | |||
<div style="color:#b3d4f8; font-size:0.90em; line-height:1.65;"> | |||
The fourth level of the Abyss Lake Underground Cave is an ancient sealed cavern, home to massive Dragon-race creatures and skeletal constructs of enormous size. Boss-type monsters appear more frequently and hit far harder than surface variants. The Dragon & Bone Set rewards the bravest hunters with <strong style="color:#90caf9;">Dragon resistance, Boss damage mitigation, and critical power</strong> — and is the only set to ship with <strong style="color:#80deea;">two distinct item combos</strong>. | The fourth level of the Abyss Lake Underground Cave is an ancient sealed cavern, home to massive Dragon-race creatures and skeletal constructs of enormous size. Boss-type monsters appear more frequently and hit far harder than surface variants. The Dragon & Bone Set rewards the bravest hunters with <strong style="color:#90caf9;">Dragon resistance, Boss damage mitigation, and critical power</strong> — and is the only set to ship with <strong style="color:#80deea;">two distinct item combos</strong>. | ||
</div> | |||
<div style="position:relative;z-index:1;margin-top:14px;background:rgba(6,14,34,0.64);border:1px solid rgba(60,150,240,0.18);border-radius:9px;padding:13px 15px;"> | |||
<div style="font-weight:bold;color:#90caf9;font-size:0.88em;letter-spacing:0.09em;text-transform:uppercase;margin-bottom:10px;">🐉 Monster Population — abyss_04</div> | |||
<div style="display:grid;grid-template-columns:1fr 1fr;gap:10px;"> | |||
<div style="background:rgba(6,14,34,0.84);border:1px solid rgba(60,150,240,0.22);border-radius:9px;padding:11px 13px;position:relative;overflow:hidden;"> | |||
<div style="position:absolute;bottom:0;right:0;width:70px;height:70px;background:radial-gradient(circle,rgba(60,150,240,0.22),transparent 70%);opacity:0.60;pointer-events:none;"></div> | |||
<div style="position:relative;z-index:1;">{{Monster|id=20612|name=Purple Ferus}}</div> | |||
<div style="position:relative;z-index:1;color:#bbdefb;font-size:0.84em;margin-top:7px;font-weight:bold;"><span style="font-family:'Courier New',monospace;color:#90a4ae;font-size:0.78em;text-transform:uppercase;letter-spacing:0.08em;">Spawn</span> 25 monsters</div> | |||
<div style="position:relative;z-index:1;color:#78909c;font-size:0.78em;margin-top:4px;line-height:1.45;">Fast Dragon monster with 5-second respawn.</div> | |||
</div> | |||
<div style="background:rgba(6,14,34,0.84);border:1px solid rgba(60,150,240,0.22);border-radius:9px;padding:11px 13px;position:relative;overflow:hidden;"> | |||
<div style="position:absolute;bottom:0;right:0;width:70px;height:70px;background:radial-gradient(circle,rgba(60,150,240,0.22),transparent 70%);opacity:0.60;pointer-events:none;"></div> | |||
<div style="position:relative;z-index:1;">{{Monster|id=20613|name=Treasure Mimic}}</div> | |||
<div style="position:relative;z-index:1;color:#bbdefb;font-size:0.84em;margin-top:7px;font-weight:bold;"><span style="font-family:'Courier New',monospace;color:#90a4ae;font-size:0.78em;text-transform:uppercase;letter-spacing:0.08em;">Spawn</span> 15 monsters</div> | |||
<div style="position:relative;z-index:1;color:#78909c;font-size:0.78em;margin-top:4px;line-height:1.45;">Treasure-themed support monster with 5-second respawn.</div> | |||
</div> | |||
<div style="background:rgba(6,14,34,0.84);border:1px solid rgba(60,150,240,0.22);border-radius:9px;padding:11px 13px;position:relative;overflow:hidden;"> | |||
<div style="position:absolute;bottom:0;right:0;width:70px;height:70px;background:radial-gradient(circle,rgba(60,150,240,0.22),transparent 70%);opacity:0.60;pointer-events:none;"></div> | |||
<div style="position:relative;z-index:1;">{{Monster|id=20614|name=Black Acidus}}</div> | |||
<div style="position:relative;z-index:1;color:#bbdefb;font-size:0.84em;margin-top:7px;font-weight:bold;"><span style="font-family:'Courier New',monospace;color:#90a4ae;font-size:0.78em;text-transform:uppercase;letter-spacing:0.08em;">Spawn</span> 35 monsters</div> | |||
<div style="position:relative;z-index:1;color:#78909c;font-size:0.78em;margin-top:4px;line-height:1.45;">Main dark dragon pressure with 5-second respawn.</div> | |||
</div> | |||
<div style="background:rgba(6,14,34,0.84);border:1px solid rgba(60,150,240,0.22);border-radius:9px;padding:11px 13px;position:relative;overflow:hidden;"> | |||
<div style="position:absolute;bottom:0;right:0;width:70px;height:70px;background:radial-gradient(circle,rgba(60,150,240,0.22),transparent 70%);opacity:0.60;pointer-events:none;"></div> | |||
<div style="position:relative;z-index:1;">{{Monster|id=20615|name=Silver Acidus}}</div> | |||
<div style="position:relative;z-index:1;color:#bbdefb;font-size:0.84em;margin-top:7px;font-weight:bold;"><span style="font-family:'Courier New',monospace;color:#90a4ae;font-size:0.78em;text-transform:uppercase;letter-spacing:0.08em;">Spawn</span> 35 monsters</div> | |||
<div style="position:relative;z-index:1;color:#78909c;font-size:0.78em;margin-top:4px;line-height:1.45;">Main silver dragon pressure with 5-second respawn.</div> | |||
</div> | |||
<div style="background:rgba(6,14,34,0.84);border:1px solid rgba(60,150,240,0.22);border-radius:9px;padding:11px 13px;position:relative;overflow:hidden;"> | |||
<div style="position:absolute;bottom:0;right:0;width:70px;height:70px;background:radial-gradient(circle,rgba(60,150,240,0.22),transparent 70%);opacity:0.60;pointer-events:none;"></div> | |||
<div style="position:relative;z-index:1;">{{Monster|id=20616|name=Bone Ferus}}</div> | |||
<div style="position:relative;z-index:1;color:#bbdefb;font-size:0.84em;margin-top:7px;font-weight:bold;"><span style="font-family:'Courier New',monospace;color:#90a4ae;font-size:0.78em;text-transform:uppercase;letter-spacing:0.08em;">Spawn</span> 50 monsters</div> | |||
<div style="position:relative;z-index:1;color:#78909c;font-size:0.78em;margin-top:4px;line-height:1.45;">Dense skeletal dragon population with 5-second respawn.</div> | |||
</div> | |||
<div style="background:rgba(6,14,34,0.84);border:1px solid rgba(60,150,240,0.22);border-radius:9px;padding:11px 13px;position:relative;overflow:hidden;"> | |||
<div style="position:absolute;bottom:0;right:0;width:70px;height:70px;background:radial-gradient(circle,rgba(60,150,240,0.22),transparent 70%);opacity:0.60;pointer-events:none;"></div> | |||
<div style="position:relative;z-index:1;">{{Monster|id=20617|name=Bone Acidus}}</div> | |||
<div style="position:relative;z-index:1;color:#bbdefb;font-size:0.84em;margin-top:7px;font-weight:bold;"><span style="font-family:'Courier New',monospace;color:#90a4ae;font-size:0.78em;text-transform:uppercase;letter-spacing:0.08em;">Spawn</span> 50 monsters</div> | |||
<div style="position:relative;z-index:1;color:#78909c;font-size:0.78em;margin-top:4px;line-height:1.45;">Dense skeletal acidus population with 5-second respawn.</div> | |||
</div> | |||
</div> | |||
<div style="background:linear-gradient(135deg,rgba(20,16,36,0.96),rgba(8,6,4,0.99));border:1px solid rgba(120,180,255,0.36);border-left:4px solid #90caf9;border-radius:9px;padding:12px 14px;position:relative;overflow:hidden;margin-top:12px;"> | |||
<div style="position:absolute;top:0;right:0;width:160px;height:100%;background:linear-gradient(270deg,rgba(120,180,255,0.36),transparent);opacity:0.55;pointer-events:none;"></div> | |||
<div style="position:relative;z-index:1;display:grid;grid-template-columns:1fr auto;gap:12px;align-items:center;"> | |||
<div> | |||
<div style="font-weight:bold;color:#90caf9;font-size:0.82em;letter-spacing:0.10em;text-transform:uppercase;margin-bottom:6px;">👑 Fever MVP</div> | |||
<div>{{Monster|id=20618|name=Bone Detardeurus}}</div> | |||
</div> | |||
<div style="text-align:right;color:#d7c8a0;font-size:0.82em;line-height:1.55;"> | |||
<div><strong style="color:#90caf9;">Spawn:</strong> 1 monster</div> | |||
<div><strong style="color:#90caf9;">Respawn:</strong> 20 minutes</div> | |||
</div> | |||
</div> | |||
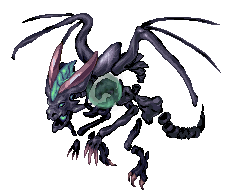
<div style="position:relative;z-index:1;color:#9a9088;font-size:0.80em;line-height:1.55;margin-top:8px;">Frequent Abyss Fever MVP objective in a dense Dragon/Bone hunting zone.</div> | |||
</div> | |||
<div style="margin-top:12px;padding:10px 12px;background:rgba(0,0,0,0.22);border:1px solid rgba(255,255,255,0.08);border-radius:7px;color:#78909c;font-size:0.82em;line-height:1.60;"> | |||
<strong style="color:#90caf9;">Total Population:</strong> 210 regular monsters + 1 MVP. A dense Dragon/Bone Fever map with very fast regular monster respawn and a frequent MVP objective. | |||
</div> | |||
</div> | </div> | ||
</div> | </div> | ||
Revision as of 02:25, 19 May 2026
Core Fever Rules
🔥
Random Options
Every piece of equipment that drops inside a Fever map — armor, shoes, manteau, and boss drops — always comes with random stat options themed to that map.
💎
Rupes Nigra Drops
All Fever monsters — normal and elite — have a chance to drop Rupes Nigra crafting materials. Deeper, harder maps have better odds for rarer tiers.
⚠️
GvG / WoE Restriction
Set bonuses and special effects are fully disabled on any map flagged as GvG, WoE, Castle, or Guild War. Equipment can still be worn, but the bonuses are suppressed.
Rupes Nigra Material Chain
🌿
Payon Forest
Forest Set
🏜️
Sograt Desert
Sand Set
🏚️
Glast Heim
Shadow Set
🌋
Magma Dungeon
Magma Set
🐉
Abyss Lake
Dragon & Bone Set
Payon Forest Fever Field


Forest Set
Forest Set Bonus
⬡ Full Set Effect (Armor + Shoes + Manteau)
- Max HP +10%
- Natural HP recovery +15%
- Damage dealt to Plant and Brute monsters +8%
- HP healing received +20%
⚠ Set bonuses are disabled on GvG / WoE flagged maps.
Forest Item Combo
Forest Fever MVP
Fever MVP Drop — Forest Armor / Shoes / Manteau with Special Options
- Damage against Plant race +8% ~ +14%
- Damage against Brute race +6% ~ +12%
- Healing received from all sources +6% ~ +10%
- Chance (5%) on kill: instantly recover 3% Max HP
- Earth element resistance +5% ~ +9%
Sograt Desert Fever Field


Sand Set
Sand Set Bonus
⬡ Full Set Effect (Armor + Shoes + Manteau)
- Max HP +8%
- Ranged damage received −5%
- Damage dealt to Fire element monsters +10%
- Resistance to status effects (Silence, Curse, Blind, Stun) +20%
⚠ Set bonuses are disabled on GvG / WoE flagged maps.
Desert Item Combo
Desert Fever MVP
Fever MVP Drop — Sand Armor / Shoes / Manteau with Special Options
- Damage against Demon race +8% ~ +14%
- Damage against Brute race +6% ~ +11%
- Ranged damage received −6% ~ −10% additional
- Chance (8%) when hit: gain +12 DEF for 5 seconds
- Fire element resistance +6% ~ +10% additional
Glast Heim Fever Dungeons


Shadow Set
Shadow Set Bonus
⬡ Full Set Effect (Armor + Shoes + Manteau)
- Damage received from Undead and Demon monsters −10%
- Shadow element resistance +10%
- SP recovery +20% inside Fever maps
- Curse status duration received −50%
⚠ Set bonuses are disabled on GvG / WoE flagged maps.
Glast Heim Item Combo
Glast Heim Fever MVP
Fever MVP Drop — Shadow Armor / Shoes / Manteau with Special Options
- Damage against Undead race +8% ~ +14%
- Damage against Demon race +7% ~ +13%
- Shadow element resistance +6% ~ +11% additional
- Holy element resistance +4% ~ +8%
- Chance (7%) when hit: reduce next instance of damage by 15% (2-second window)
- Chance (10%) on Undead kill: recover 4% Max SP
Magma Dungeon Level 3 Fever Area


Magma Set
Magma Set Bonus
⬡ Full Set Effect (Armor + Shoes + Manteau)
- ATK +20 and MATK +15
- Fire element resistance +10%
- ASPD +5%
- Damage against Fire-element and Formless monsters +8%
⚠ Set bonuses are disabled on GvG / WoE flagged maps.
Magma Item Combo
Magma Fever MVP
Fever MVP Drop — Magma Armor / Shoes / Manteau with Special Options
- Damage against Fire-element monsters +8% ~ +15%
- Damage against Formless race +7% ~ +13%
- Damage against Demon race +5% ~ +10%
- Fire element resistance +6% ~ +10% additional
- Chance (8%) on attack: trigger burning aura — ATK +18 for 5 seconds
- ATK % or MATK % against Fever monsters +5% ~ +9%
Abyss Lake Underground Cave Level 4


Dragon & Bone Set
Dragon & Bone Set Bonus
⬡ Full Set Effect (Armor + Shoes + Manteau)
- Dragon race damage received −15%
- Boss race damage received −5%
- Critical rate +8 and Critical damage +5%
- Dragon Slayer effect: 1% chance summons a Dragon Spirit — adds +15 ATK for 5 seconds
⚠ Set bonuses are disabled on GvG / WoE flagged maps.
Abyss Lake Item Combos
⚠ Abyss Lake is the only Fever map with two distinct item combos. Both can be active simultaneously if all items are equipped. They do not conflict.
Abyss Lake Fever MVP
Fever MVP Drop — Dragonbone Armor / Shoes / Manteau with Special Options
- Damage against Dragon race +10% ~ +16%
- Damage against Boss-type monsters +3% ~ +10%
- Critical damage +8% ~ +14% additional
- Dragon race damage received −6% ~ +11% additional
- Neutral element resistance +5% ~ +9% additional
- Chance (5%) on critical hit: Dragon Slayer effect activates — ATK +15 for 10 seconds
System Reference
Fever Maps at a Glance
Option Design Reference
⚠ Reminder: All Fever set bonuses and item combo effects are disabled on GvG, WoE, Castle, and Guild War flagged maps. Equipment may still be worn — only the Fever-specific bonuses are suppressed. Plan your gear loadout accordingly if you participate in competitive content.