Fever Fields: Difference between revisions
Jump to navigation
Jump to search
| Line 571: | Line 571: | ||
<span style="background:rgba(200,160,30,0.18);border:1px solid rgba(200,160,30,0.40);border-radius:4px;padding:2px 8px;font-size:0.72em;color:#ffe082;font-weight:bold;letter-spacing:0.06em;text-transform:uppercase;white-space:nowrap;">Mid-Tier</span> | <span style="background:rgba(200,160,30,0.18);border:1px solid rgba(200,160,30,0.40);border-radius:4px;padding:2px 8px;font-size:0.72em;color:#ffe082;font-weight:bold;letter-spacing:0.06em;text-transform:uppercase;white-space:nowrap;">Mid-Tier</span> | ||
</div> | </div> | ||
<div style="color:#7d6020;font-size:0.80em;margin-bottom:14px;font-style:italic;">Bait · Sleep · Burst — Field Card + | <div style="color:#7d6020;font-size:0.80em;margin-bottom:14px;font-style:italic;">Bait · Sleep · Burst — Field Card + GTB MVP Drop · For physical hunters in the deep desert</div> | ||
<div style="display:grid;grid-template-columns:auto 1fr;gap:12px;align-items:start;margin-bottom:14px;"> | <div style="display:grid;grid-template-columns:auto 1fr;gap:12px;align-items:start;margin-bottom:14px;"> | ||
<div style="color:#78909c;font-size:0.82em;font-weight:bold;text-transform:uppercase;padding-top:2px;">Items</div> | <div style="color:#78909c;font-size:0.82em;font-weight:bold;text-transform:uppercase;padding-top:2px;">Items</div> | ||
<div> | <div> | ||
{{Item List|id=22001|item=Sand Shoes|simple=yes}} | {{Item List|id=22001|item=Sand Shoes|simple=yes}} | ||
<div style="margin-top:8px;">{{Item List|id=4174|item=Sandman Card|simple=yes}} <span style="color:#90a4ae;font-size:0.88em;" | <div style="margin-top:8px;">{{Item List|id=4174|item=Sandman Card|simple=yes}} <span style="color:#90a4ae;font-size:0.88em;"></div> | ||
<div style="margin-top:6px;">{{Item List|id=2225|item=Turban|simple=yes}} <span style="color:#90a4ae;font-size:0.88em;">— ~5% drop from Phreeoni MVP · worn in upper headgear slot</span></div> | <div style="margin-top:6px;">{{Item List|id=2225|item=Turban|simple=yes}} <span style="color:#90a4ae;font-size:0.88em;">— ~5% drop from Phreeoni MVP · worn in upper headgear slot</span></div> | ||
</div> | </div> | ||
| Line 582: | Line 582: | ||
<div style="color:#78909c;font-size:0.82em;font-weight:bold;text-transform:uppercase;margin-bottom:8px;">Combo Effect</div> | <div style="color:#78909c;font-size:0.82em;font-weight:bold;text-transform:uppercase;margin-bottom:8px;">Combo Effect</div> | ||
<ul style="margin:0;padding:0 0 0 18px;color:#fff9c4;font-size:0.91em;line-height:1.80;"> | <ul style="margin:0;padding:0 0 0 18px;color:#fff9c4;font-size:0.91em;line-height:1.80;"> | ||
<li> | <li>Chance of fisical attacks <strong style="color:#fffde7;">Cause Sleeping</strong> +15% </strong></li> | ||
<li> | <li>+40 Flee <strong style="color:#fffde7;"></li> | ||
</div> | </div> | ||
</div> | </div> | ||
| Line 611: | Line 608: | ||
<div> | <div> | ||
{{Item List|id=15001|item=Sand Armor|simple=yes}} | {{Item List|id=15001|item=Sand Armor|simple=yes}} | ||
<div style="margin-top:8px;">{{Item List|id=4131|item=Phreeoni Card|simple=yes}} <span style="color:#90a4ae;font-size:0.88em;" | <div style="margin-top:8px;">{{Item List|id=4131|item=Phreeoni Card|simple=yes}} <span style="color:#90a4ae;font-size:0.88em;"></div> | ||
</div> | </div> | ||
</div> | </div> | ||
| Line 617: | Line 614: | ||
<ul style="margin:0;padding:0 0 0 18px;color:#fff9c4;font-size:0.91em;line-height:1.80;"> | <ul style="margin:0;padding:0 0 0 18px;color:#fff9c4;font-size:0.91em;line-height:1.80;"> | ||
<li>Perfect Dodge <strong style="color:#fffde7;">+5</strong> additional</li> | <li>Perfect Dodge <strong style="color:#fffde7;">+5</strong> additional</li> | ||
<li | <li>+15 ATK</strong></li> | ||
<li> | <li>+15 Flee</strong></li> | ||
</div> | </div> | ||
</div> | </div> | ||
Revision as of 02:48, 27 May 2026
{
Core Fever Rules
🔥
Random Options
Every piece of equipment that drops inside a Fever map — armor, shoes, manteau, and boss drops — always comes with random stat options themed to that map.
💎
Rupes Nigra Drops
All Fever monsters — normal and elite — have a chance to drop Rupes Nigra crafting materials. Deeper, harder maps have better odds for rarer tiers.
⚠️
GvG / WoE Restriction
Set bonuses and special effects are fully disabled on any map flagged as GvG, WoE, Castle, or Guild War. Equipment can still be worn, but the bonuses are suppressed.
Rupes Nigra Material Chain
🌿
Payon Forest
Forest Set
🏜️
Sograt Desert
Sand Set
🏚️
Glast Heim
Shadow Set
🌋
Magma Dungeon
Magma Set
🐉
Abyss Lake
Dragon & Bone Set
Payon Forest Fever Field


Forest Set
Forest Set Bonus
⬡ Full Set Effect (Armor + Shoes + Manteau)
- Max HP +10%
- Natural HP recovery +15%
- Damage dealt to Plant and Brute monsters +8%
- HP healing received +20%
⚠ Set bonuses are disabled on GvG / WoE flagged maps.
Forest Item Combos
Forest Fever MVP
Fever MVP Drop — Forest Armor / Shoes / Manteau with Special Options
- Damage against Plant race +8% ~ +14%
- Damage against Brute race +6% ~ +12%
- Healing received from all sources +6% ~ +10%
- Chance (5%) on kill: instantly recover 3% Max HP
- Earth element resistance +5% ~ +9%
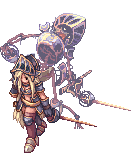
Sograt Desert Fever Field


Sand Set
Sand Set Bonus
⬡ Full Set Effect (Armor + Shoes + Manteau)
- Max HP +8%
- Ranged damage received −5%
- Damage dealt to Fire element monsters +10%
- Resistance to status effects (Silence, Curse, Blind, Stun) +20%
⚠ Set bonuses are disabled on GvG / WoE flagged maps.
Desert Item Combos
Desert Fever MVP
Fever MVP Drop — Sand Armor / Shoes / Manteau with Special Options
- Damage against Demon race +8% ~ +14%
- Damage against Brute race +6% ~ +11%
- Ranged damage received −6% ~ −10% additional
- Chance (8%) when hit: gain +12 DEF for 5 seconds
- Fire element resistance +6% ~ +10% additional
Glast Heim Fever Dungeons

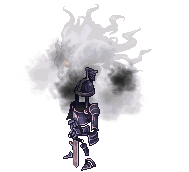
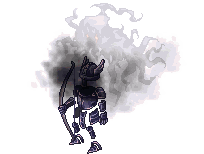
Shadow Set
Shadow Set Bonus
⬡ Full Set Effect (Armor + Shoes + Manteau)
- Damage received from Undead and Demon monsters −10%
- Shadow element resistance +10%
- SP recovery +20% inside Fever maps
- Curse status duration received −50%
⚠ Set bonuses are disabled on GvG / WoE flagged maps.
Glast Heim Item Combos
Glast Heim Fever MVP
Fever MVP Drop — Shadow Armor / Shoes / Manteau with Special Options
- Damage against Undead race +8% ~ +14%
- Damage against Demon race +7% ~ +13%
- Shadow element resistance +6% ~ +11% additional
- Holy element resistance +4% ~ +8%
- Chance (7%) when hit: reduce next instance of damage by 15% (2-second window)
- Chance (10%) on Undead kill: recover 4% Max SP
Magma Dungeon Level 3 Fever Area


Magma Set
Magma Set Bonus
⬡ Full Set Effect (Armor + Shoes + Manteau)
- ATK +20 and MATK +15
- Fire element resistance +10%
- ASPD +5%
- Damage against Fire-element and Formless monsters +8%
⚠ Set bonuses are disabled on GvG / WoE flagged maps.
Magma Item Combos
Magma Fever MVP
Fever MVP Drop — Magma Armor / Shoes / Manteau with Special Options
- Damage against Fire-element monsters +8% ~ +15%
- Damage against Formless race +7% ~ +13%
- Damage against Demon race +5% ~ +10%
- Fire element resistance +6% ~ +10% additional
- Chance (8%) on attack: trigger burning aura — ATK +18 for 5 seconds
- ATK % or MATK % against Fever monsters +5% ~ +9%
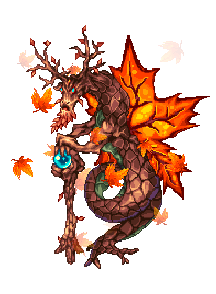
Abyss Lake Underground Cave Level 4


Dragon & Bone Set
Dragon & Bone Set Bonus
⬡ Full Set Effect (Armor + Shoes + Manteau)
- Dragon race damage received −15%
- Boss race damage received −5%
- Critical rate +8 and Critical damage +5%
- Dragon Slayer effect: 1% chance summons a Dragon Spirit — adds +15 ATK for 5 seconds
⚠ Set bonuses are disabled on GvG / WoE flagged maps.
Abyss Lake Item Combos
Abyss Lake Fever MVP
Fever MVP Drop — Dragonbone Armor / Shoes / Manteau with Special Options
- Damage against Dragon race +10% ~ +16%
- Damage against Boss-type monsters +3% ~ +10%
- Critical damage +8% ~ +14% additional
- Dragon race damage received −6% ~ +11% additional
- Neutral element resistance +5% ~ +9% additional
- Chance (5%) on critical hit: Dragon Slayer effect activates — ATK +15 for 10 seconds
System Reference
Fever Maps at a Glance
Combo Investment Reference
Option Design Reference
⚠ Reminder: All Fever set bonuses and item combo effects are disabled on GvG, WoE, Castle, and Guild War flagged maps. Equipment may still be worn — only the Fever-specific bonuses are suppressed. Plan your gear loadout accordingly if you participate in competitive content.